Personal Holiday Project
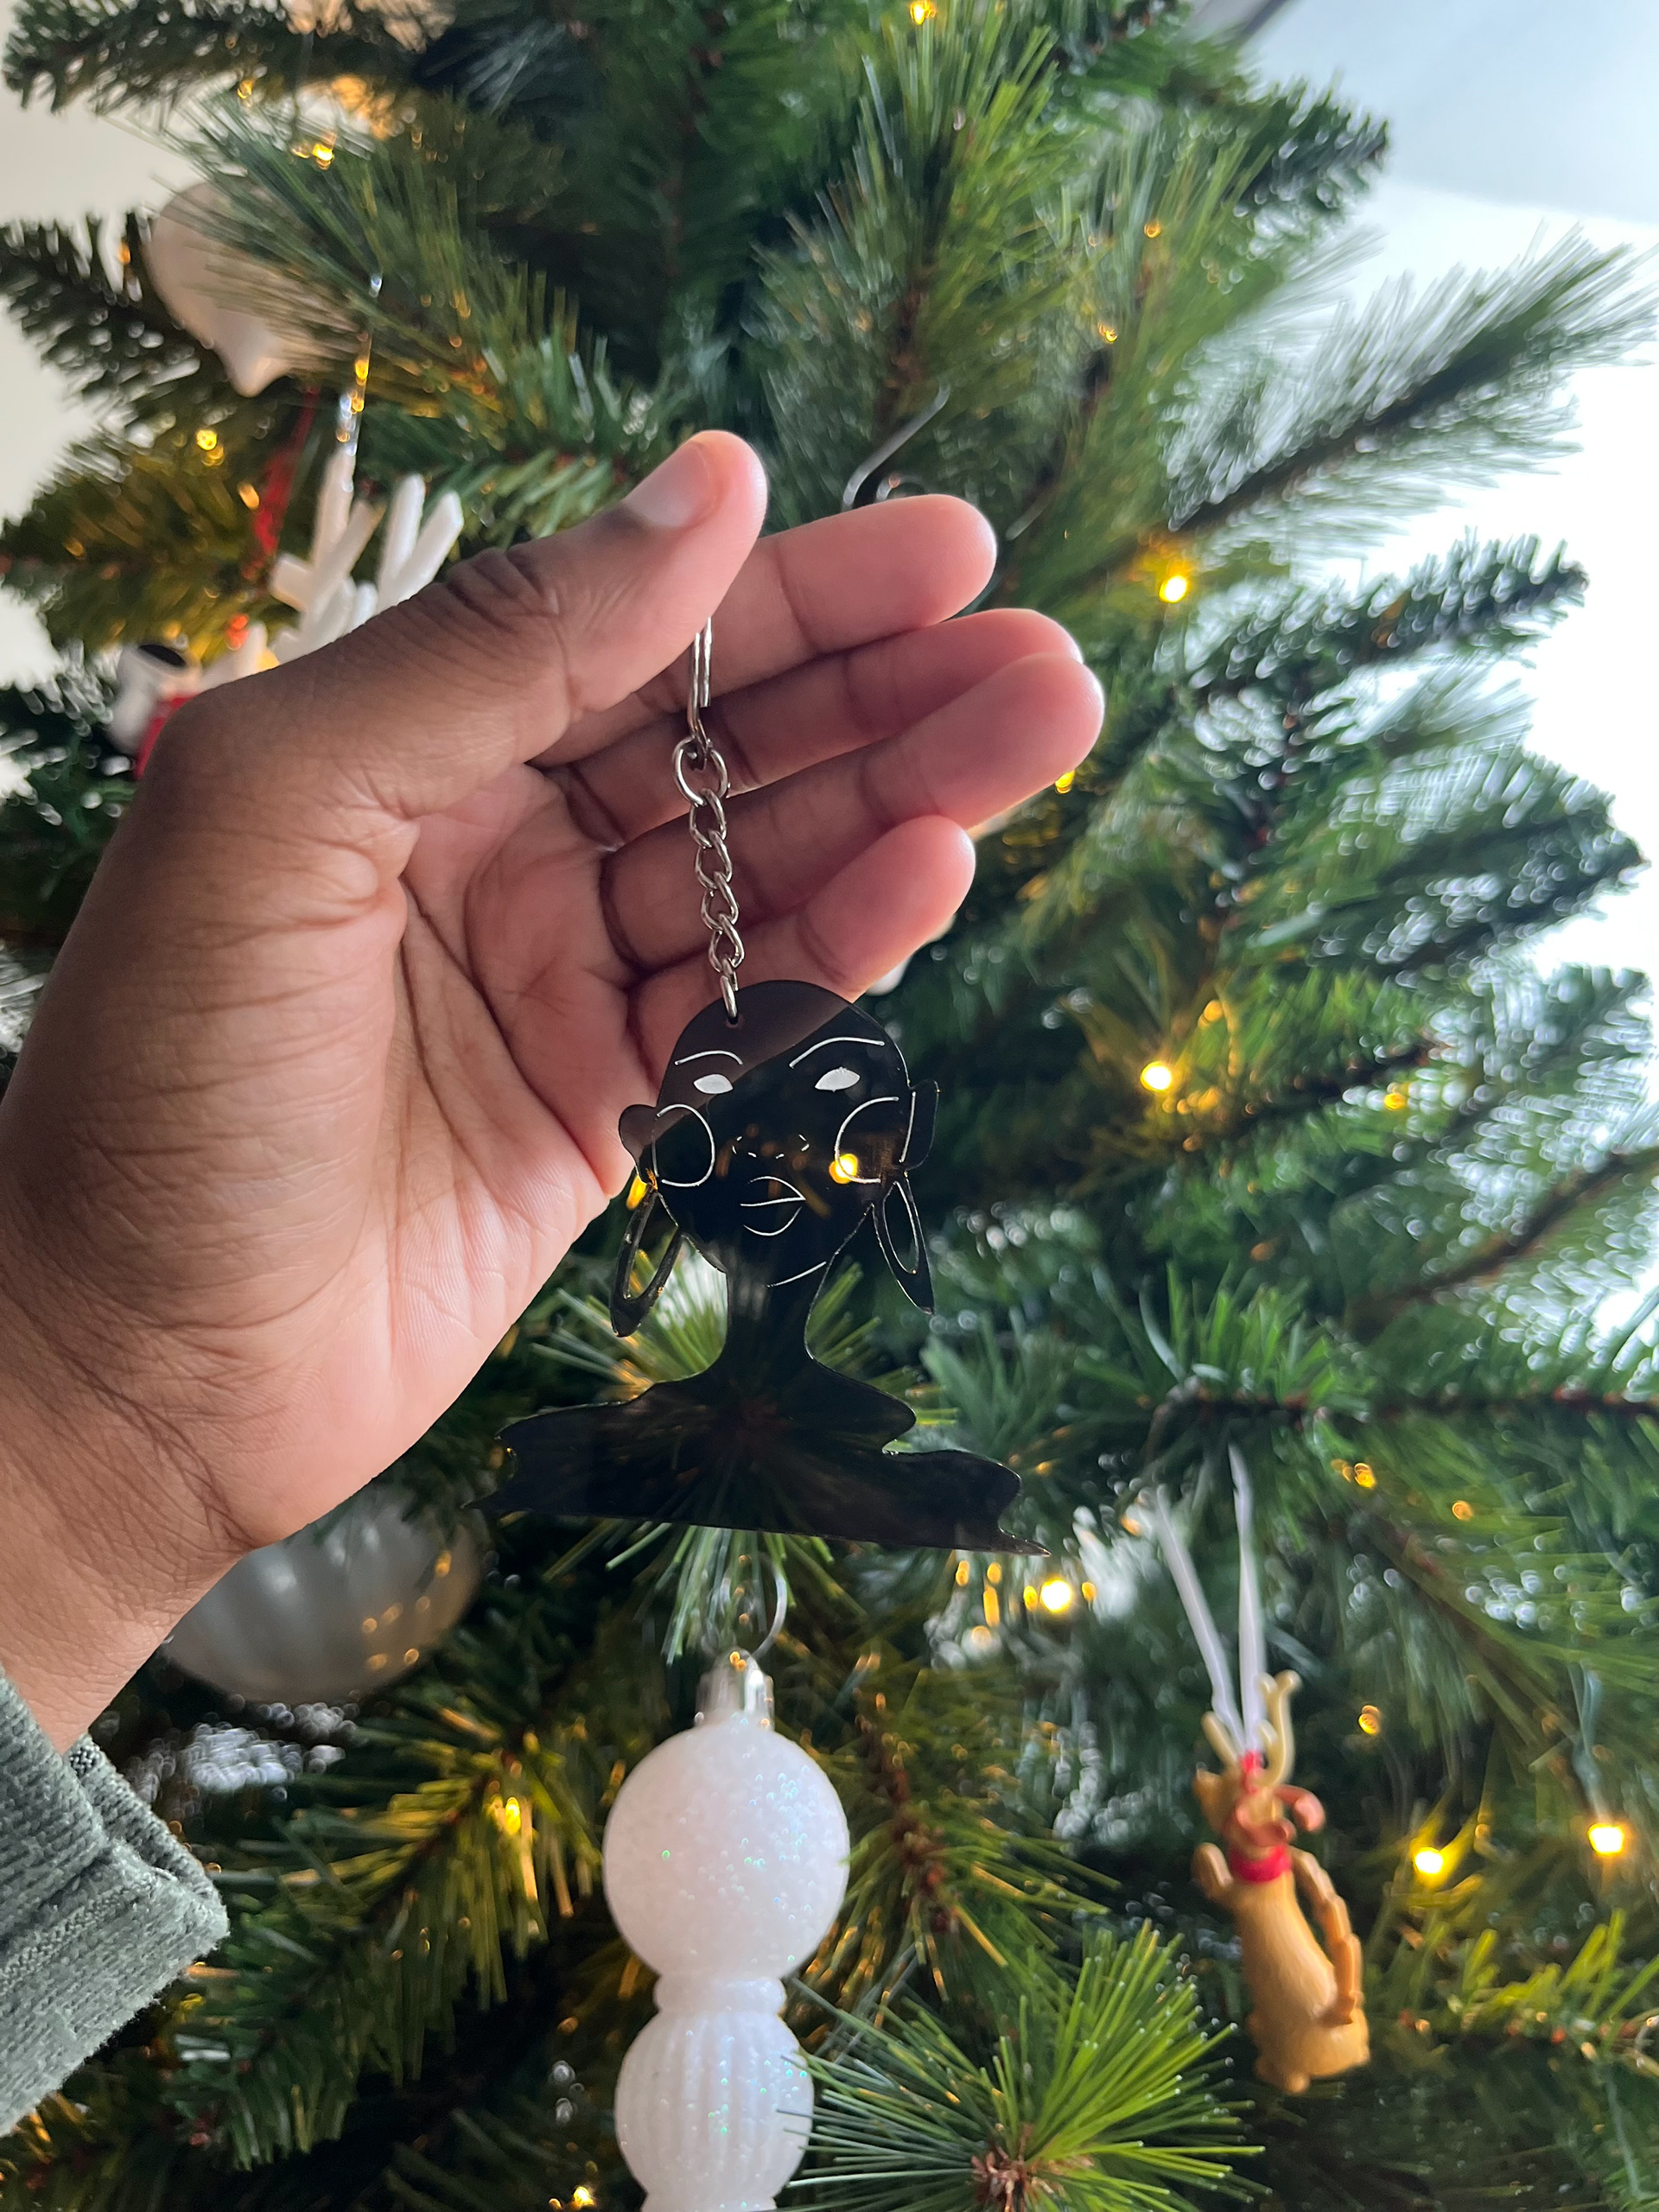
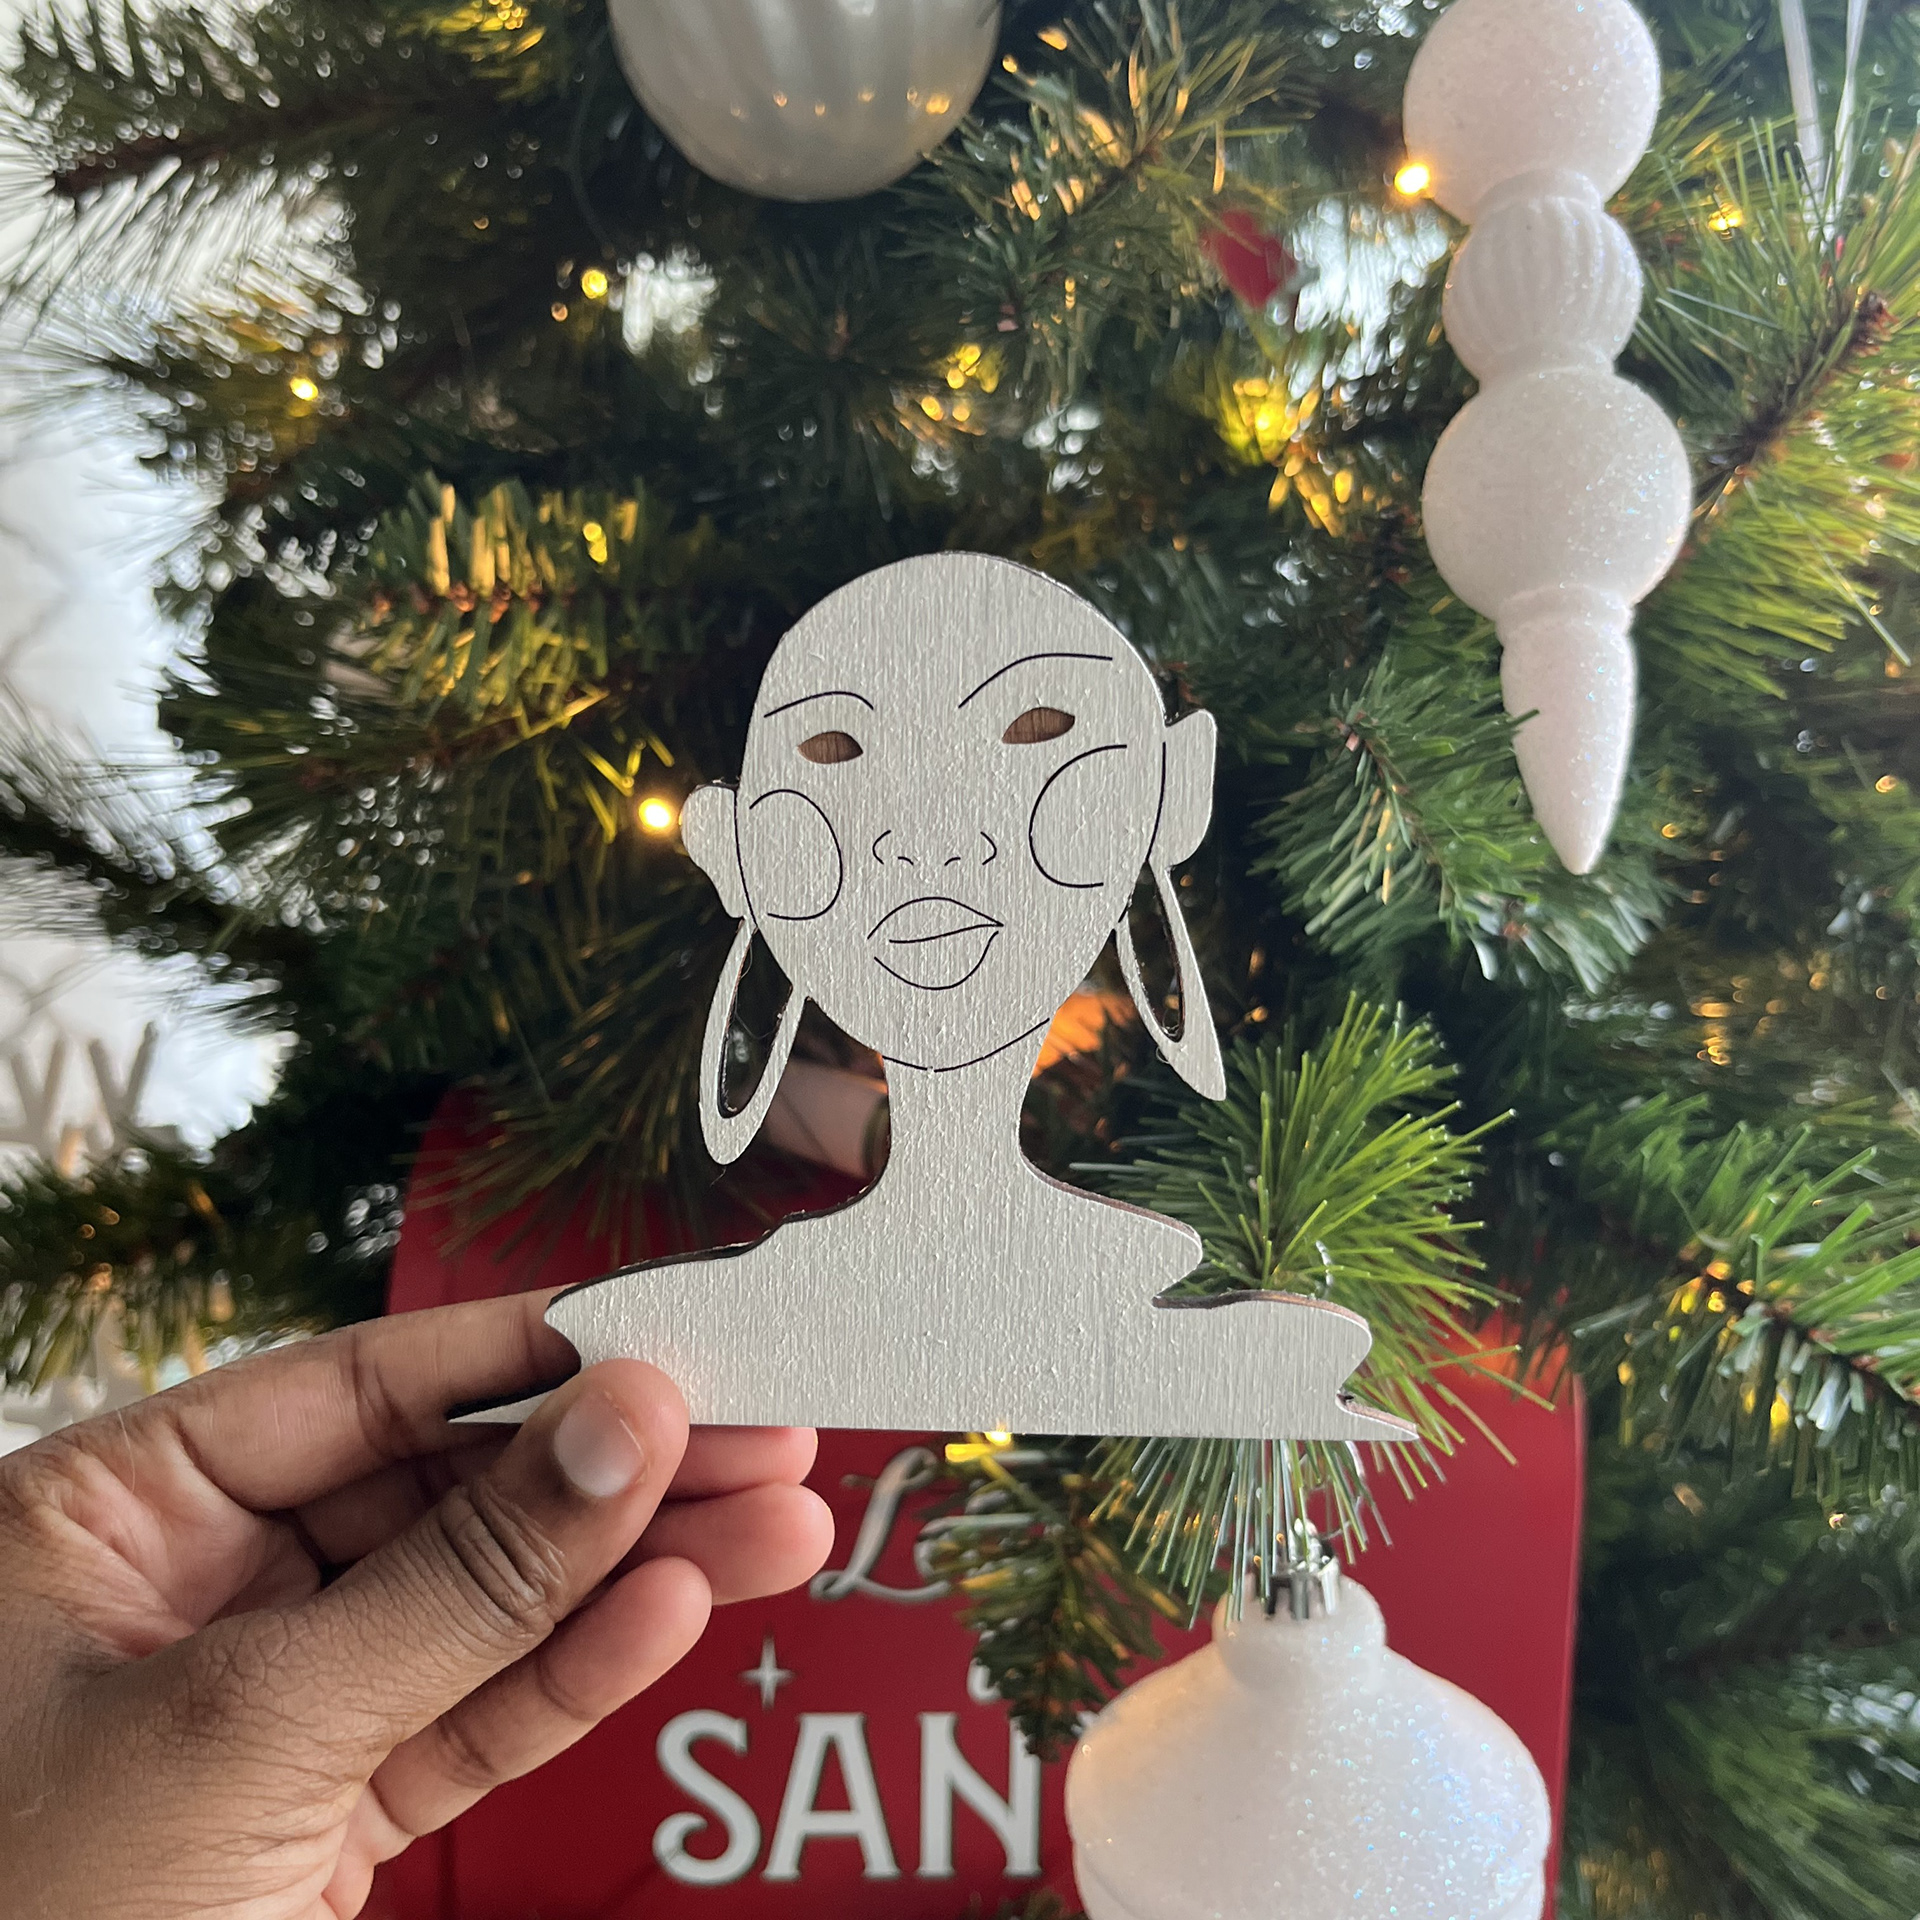
Over the course of the holiday season, I figured I made holiday gifts for loved ones based on what I learned from digital fabrication. I ended up making a collection of sturdy wooden magnets, and acrylic keychains out of my digital fab sampler design.
A fun observation I made during the process is that the acrylic sheet I purchased ended up being slightly different than previous sheets I've purchased. The acrylic sheet used for this project ended up being slightly translucent.
Anyways, the handmade digital fab gifts were a hit.
Wishing everyone a happy holidays!

Independent Project
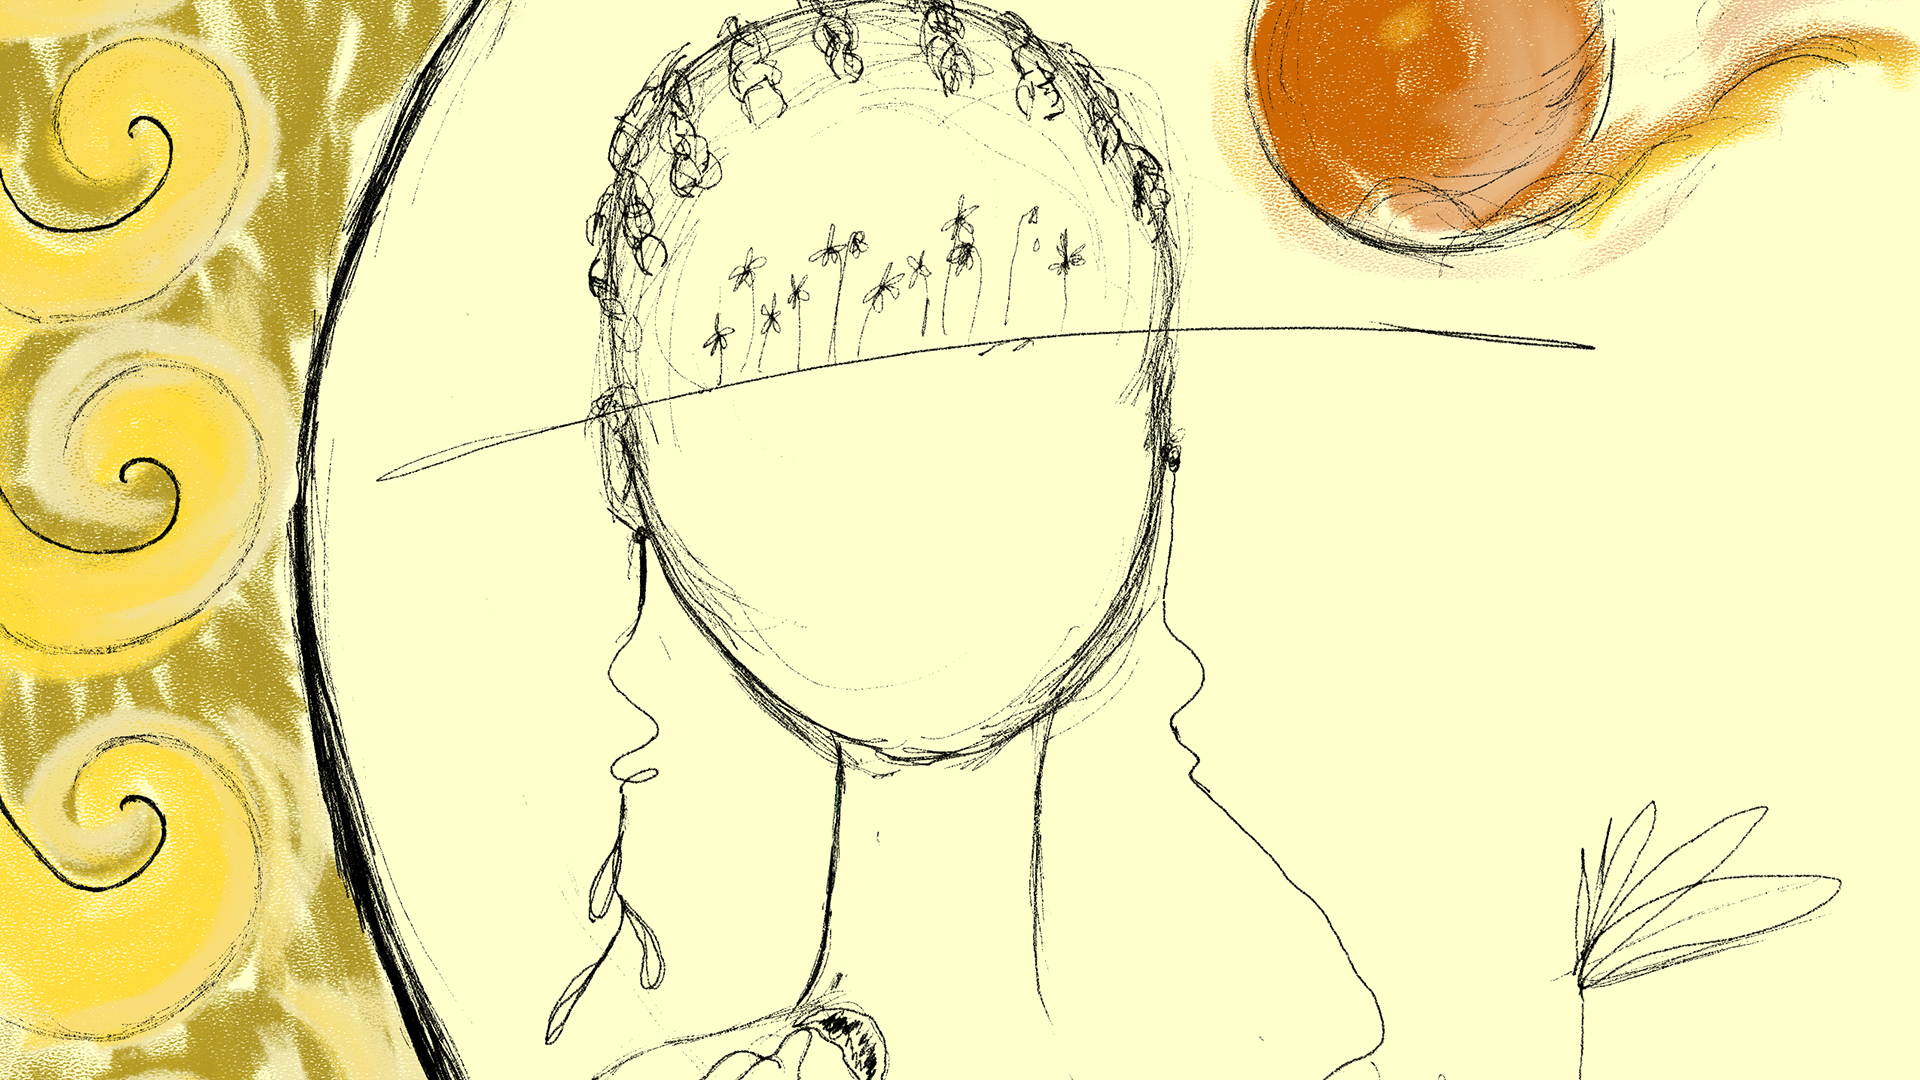
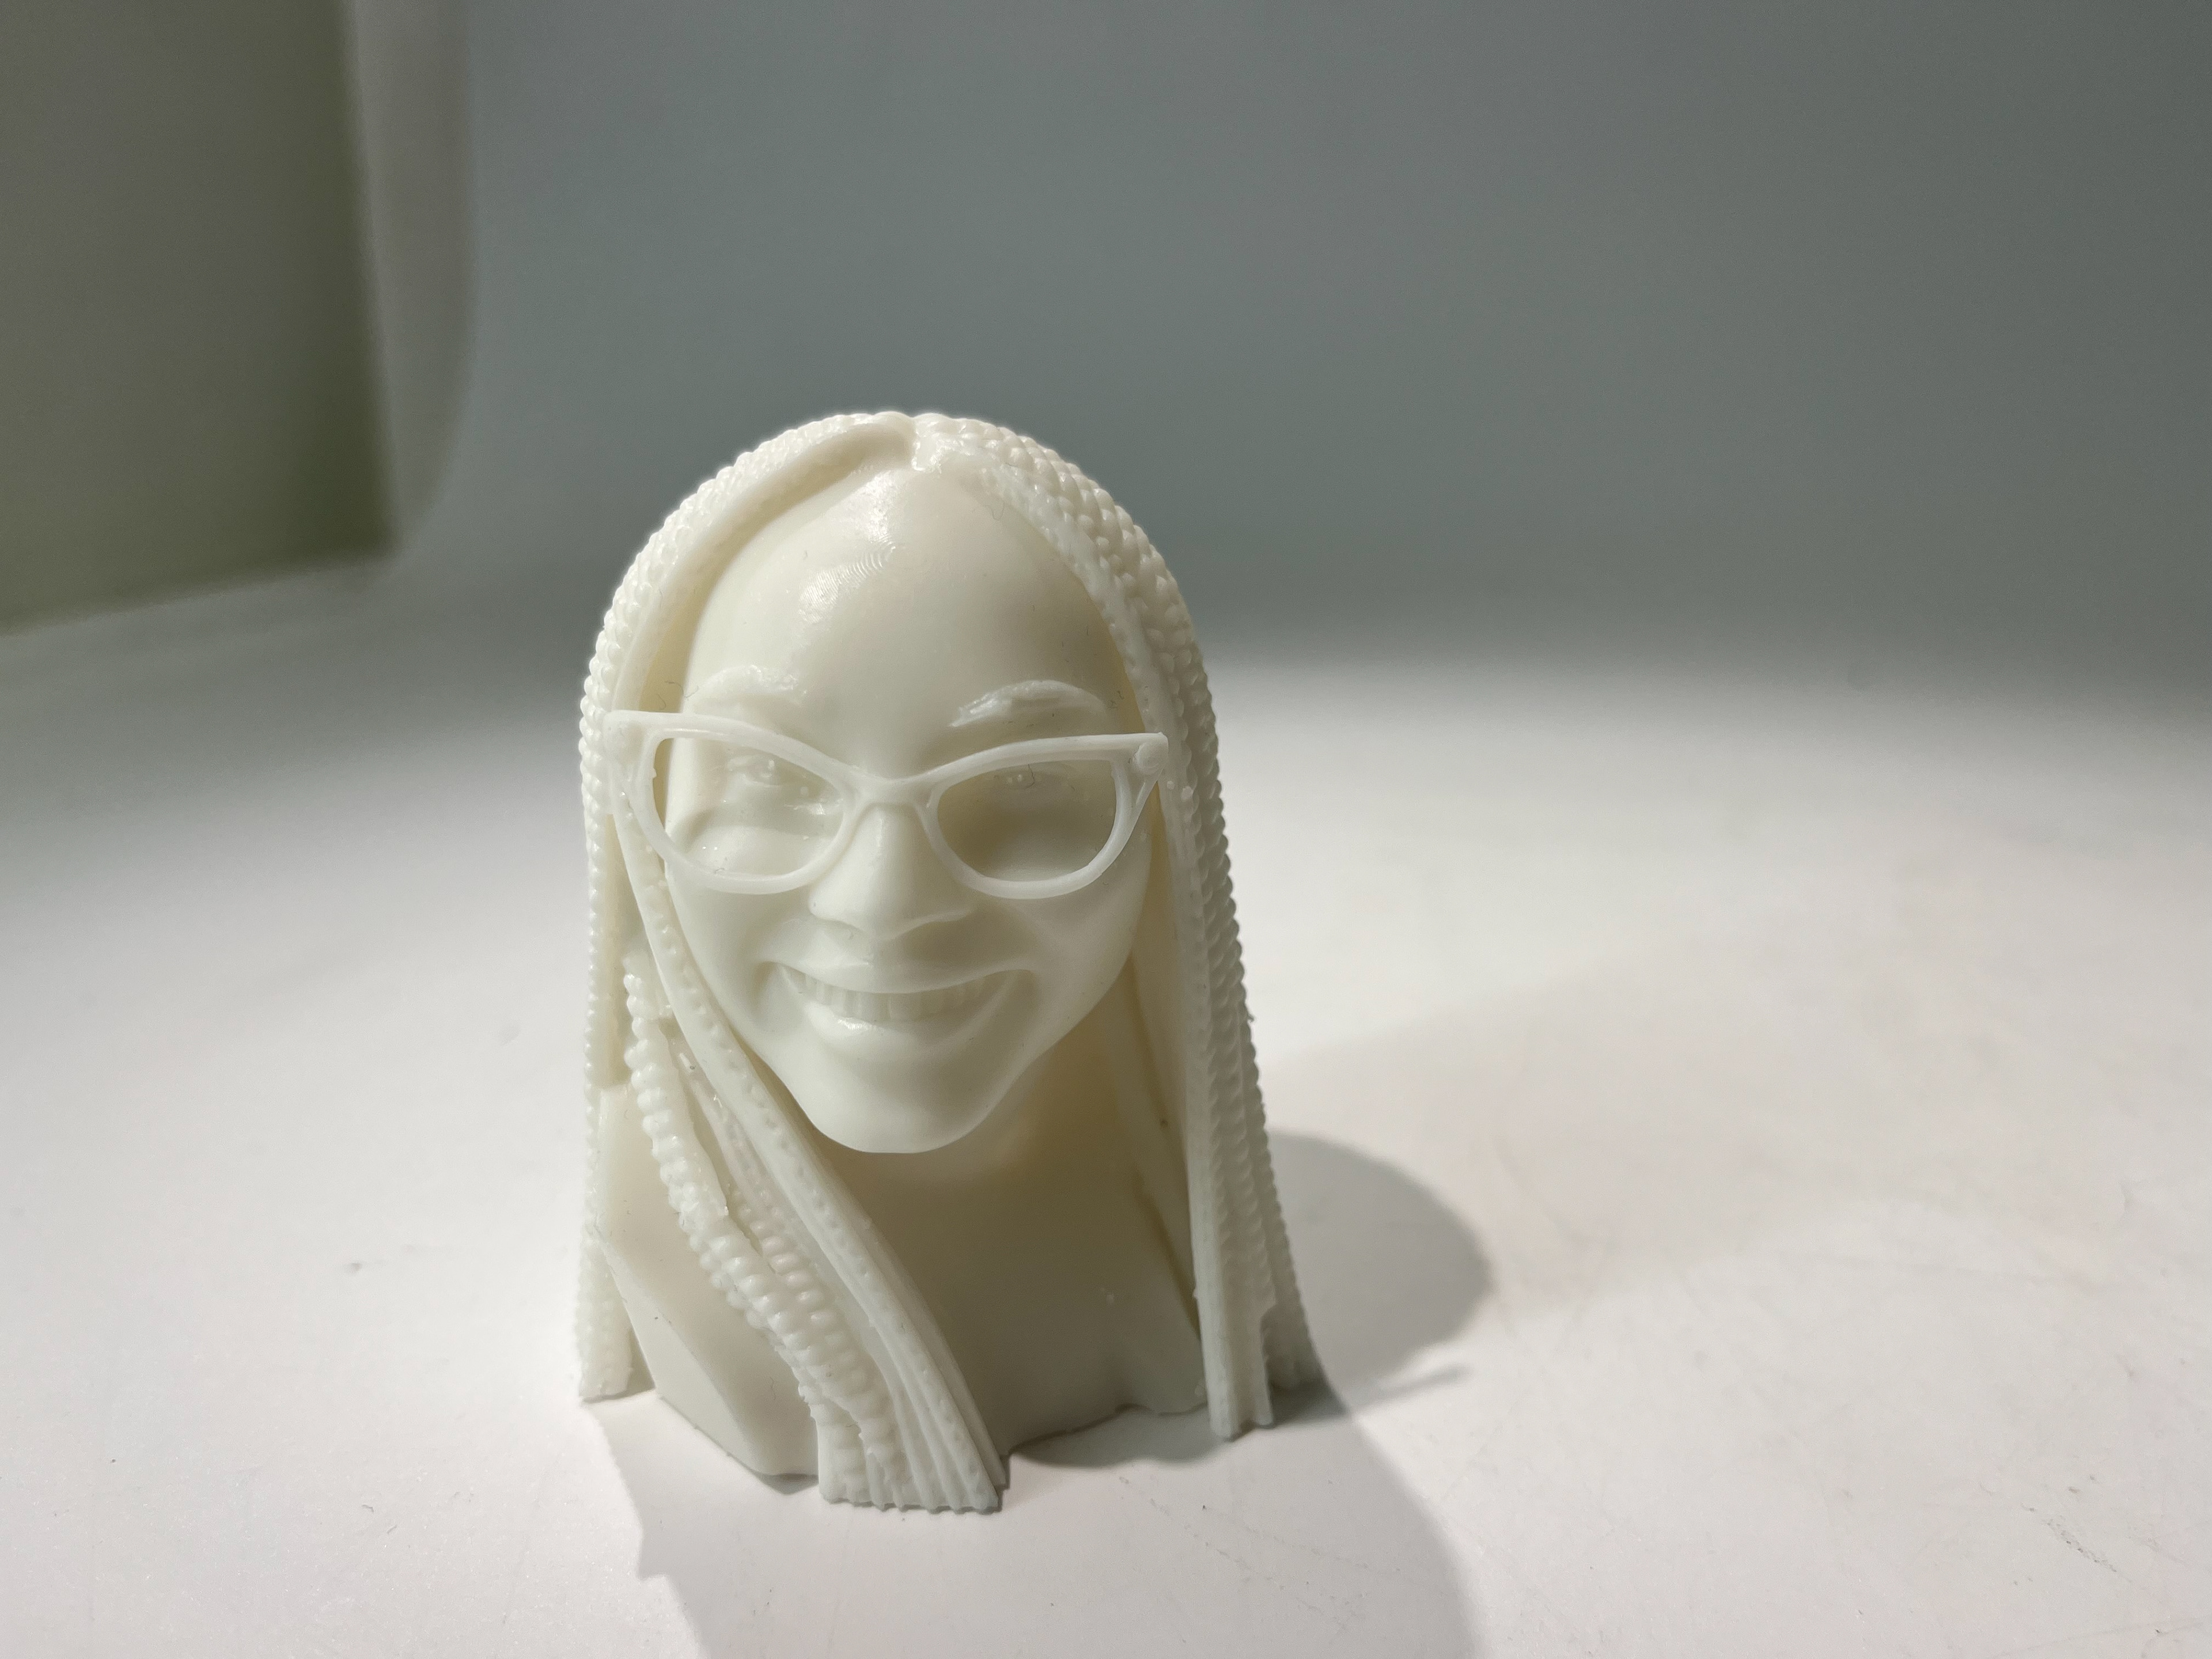
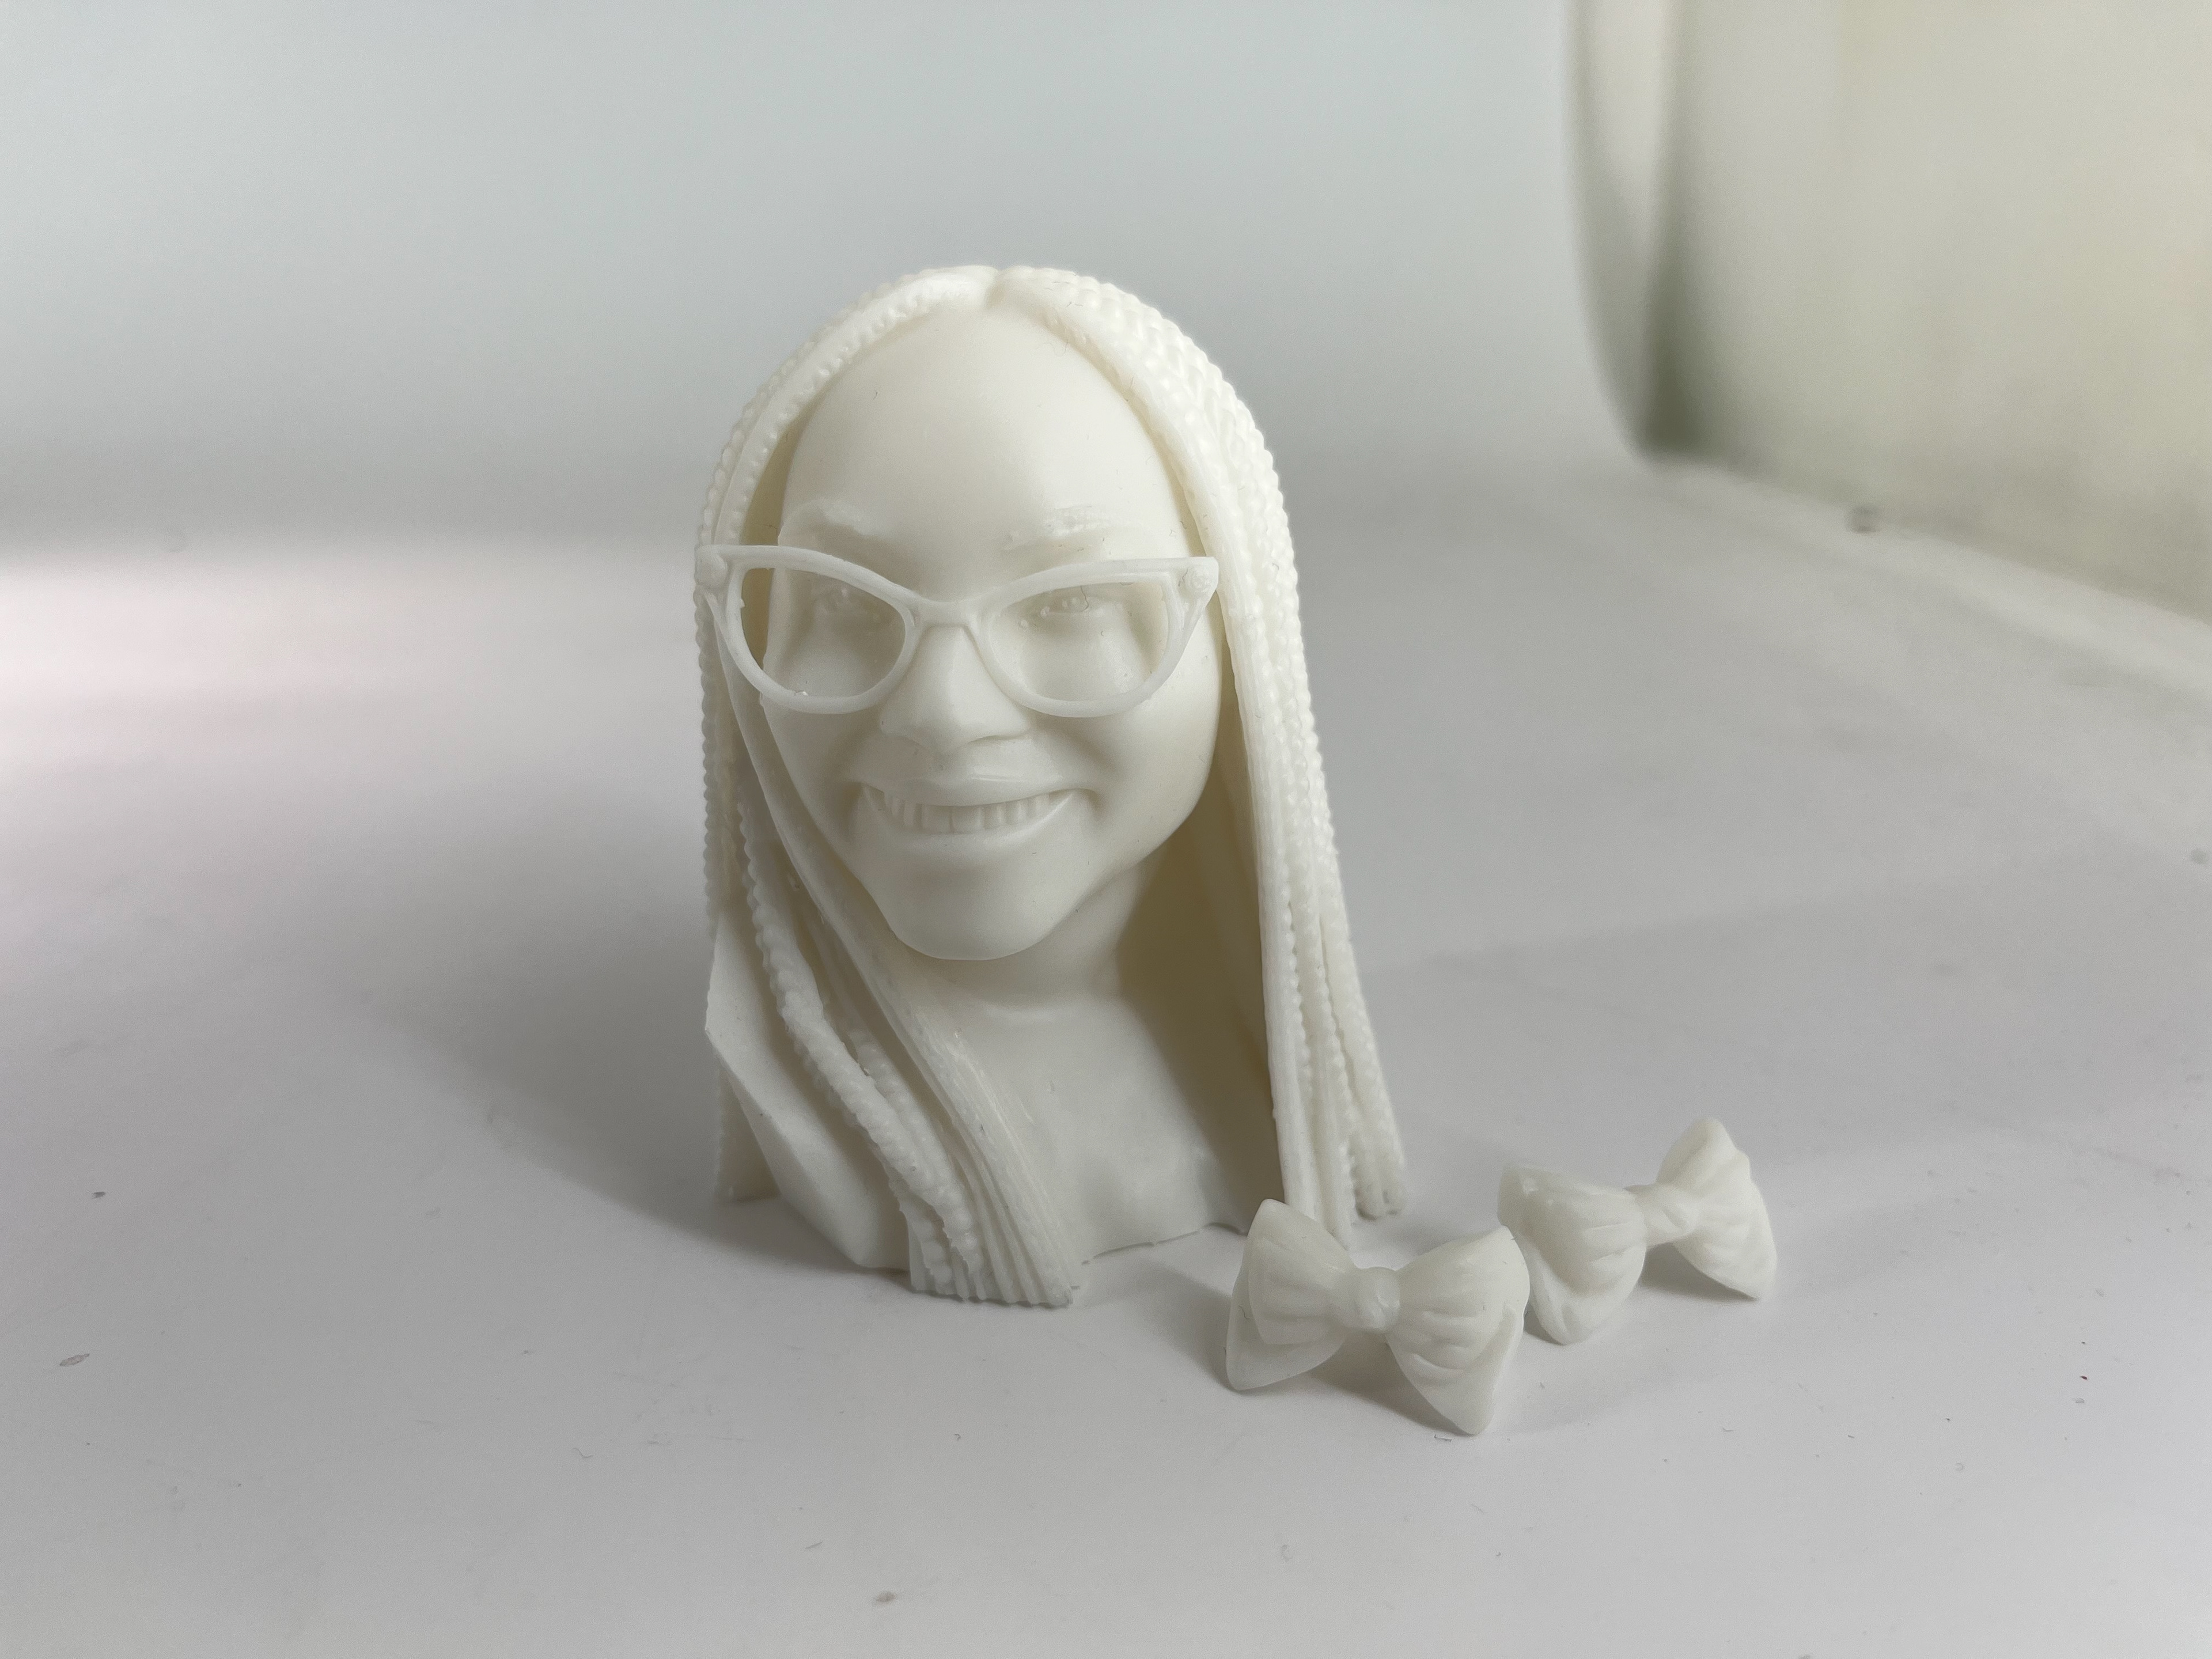
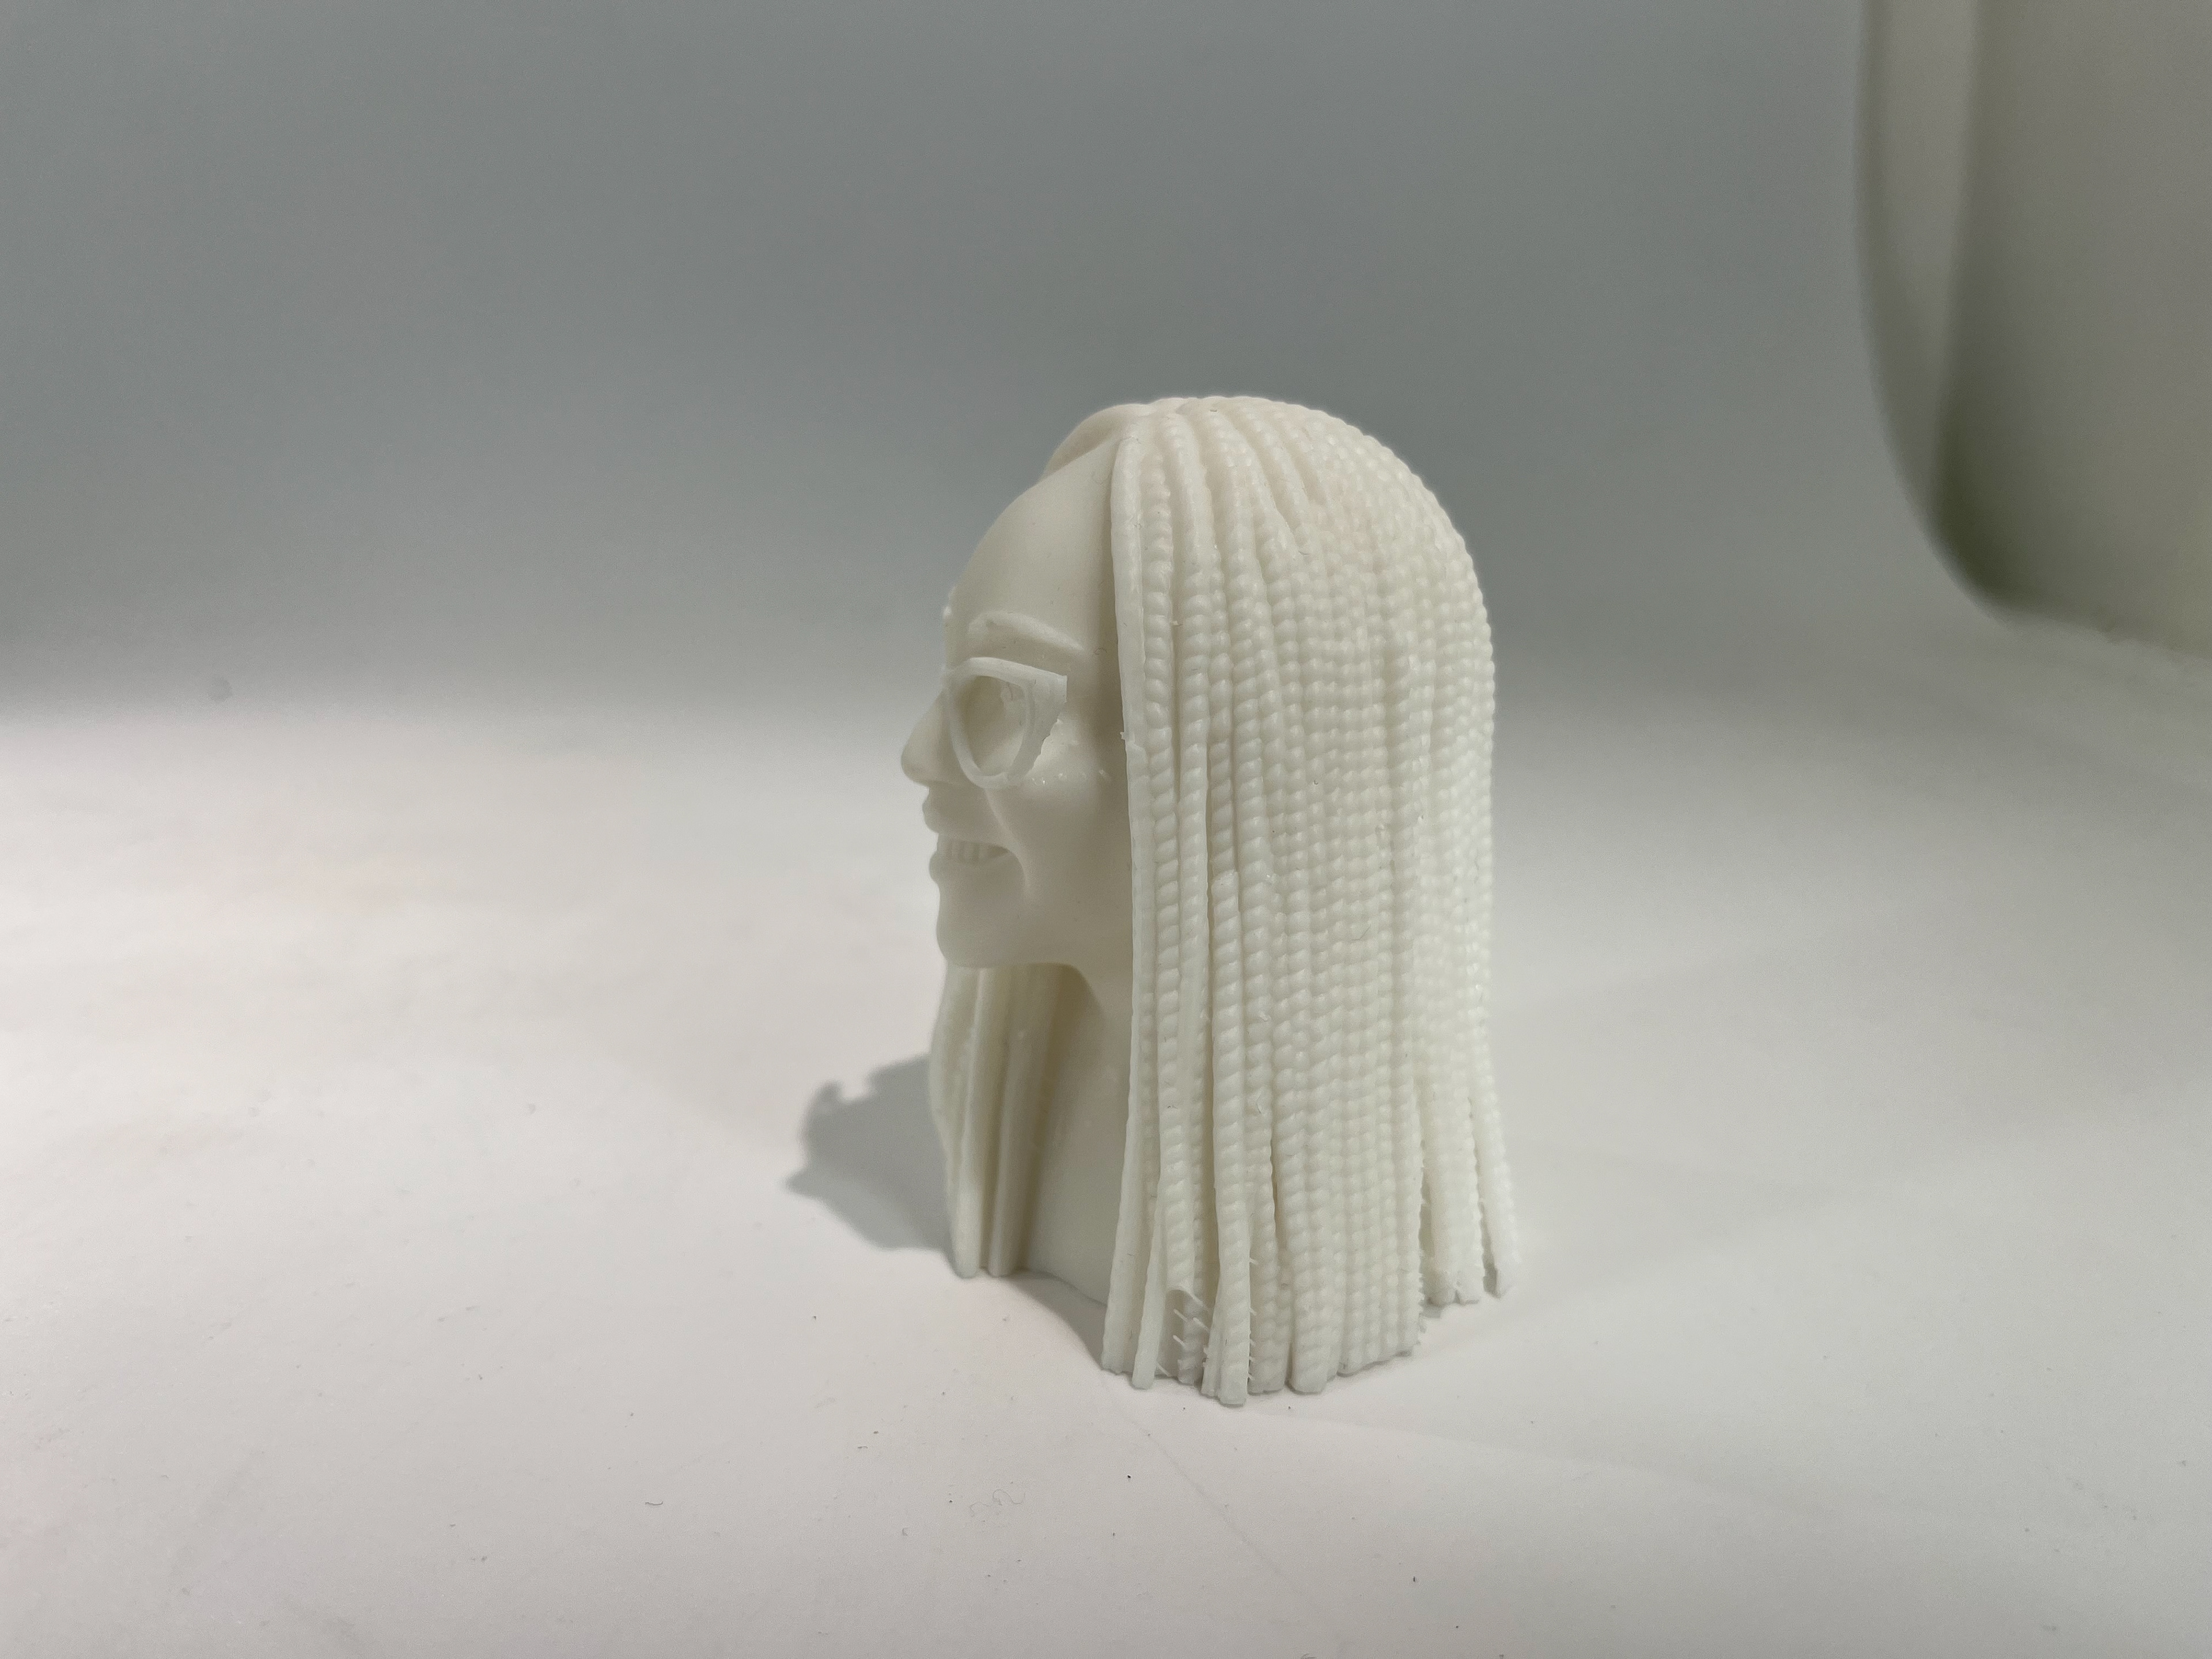
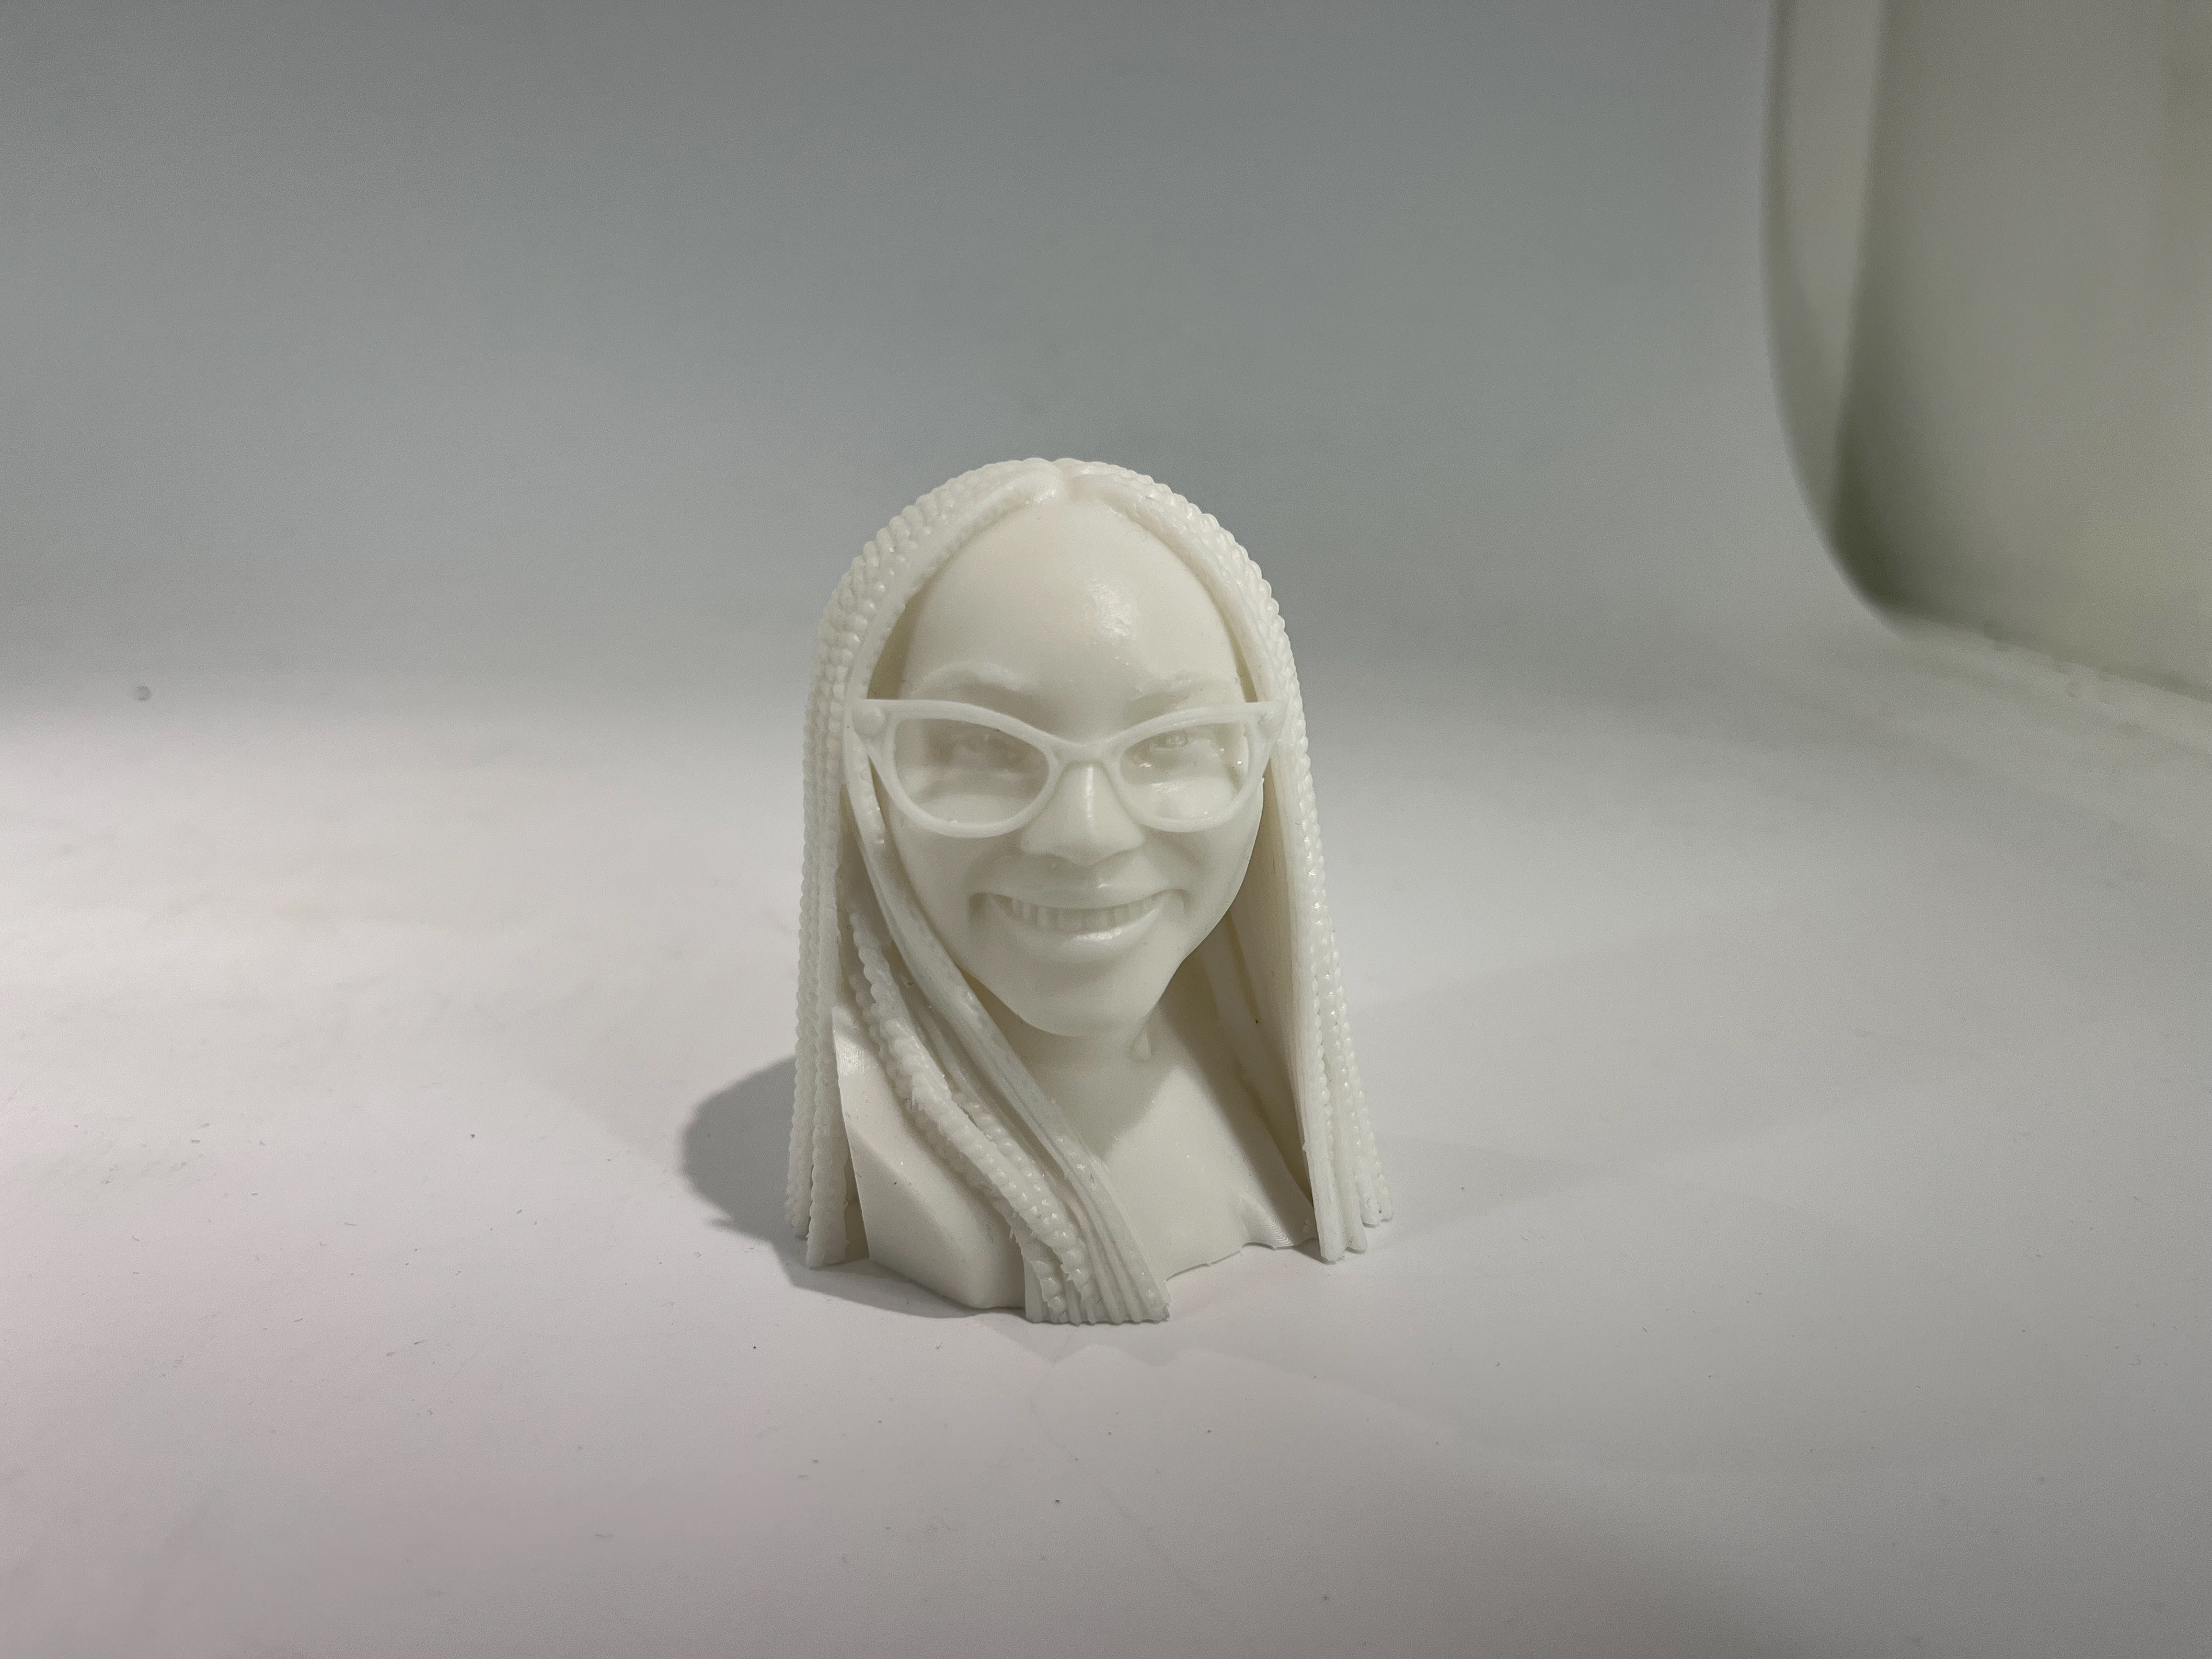
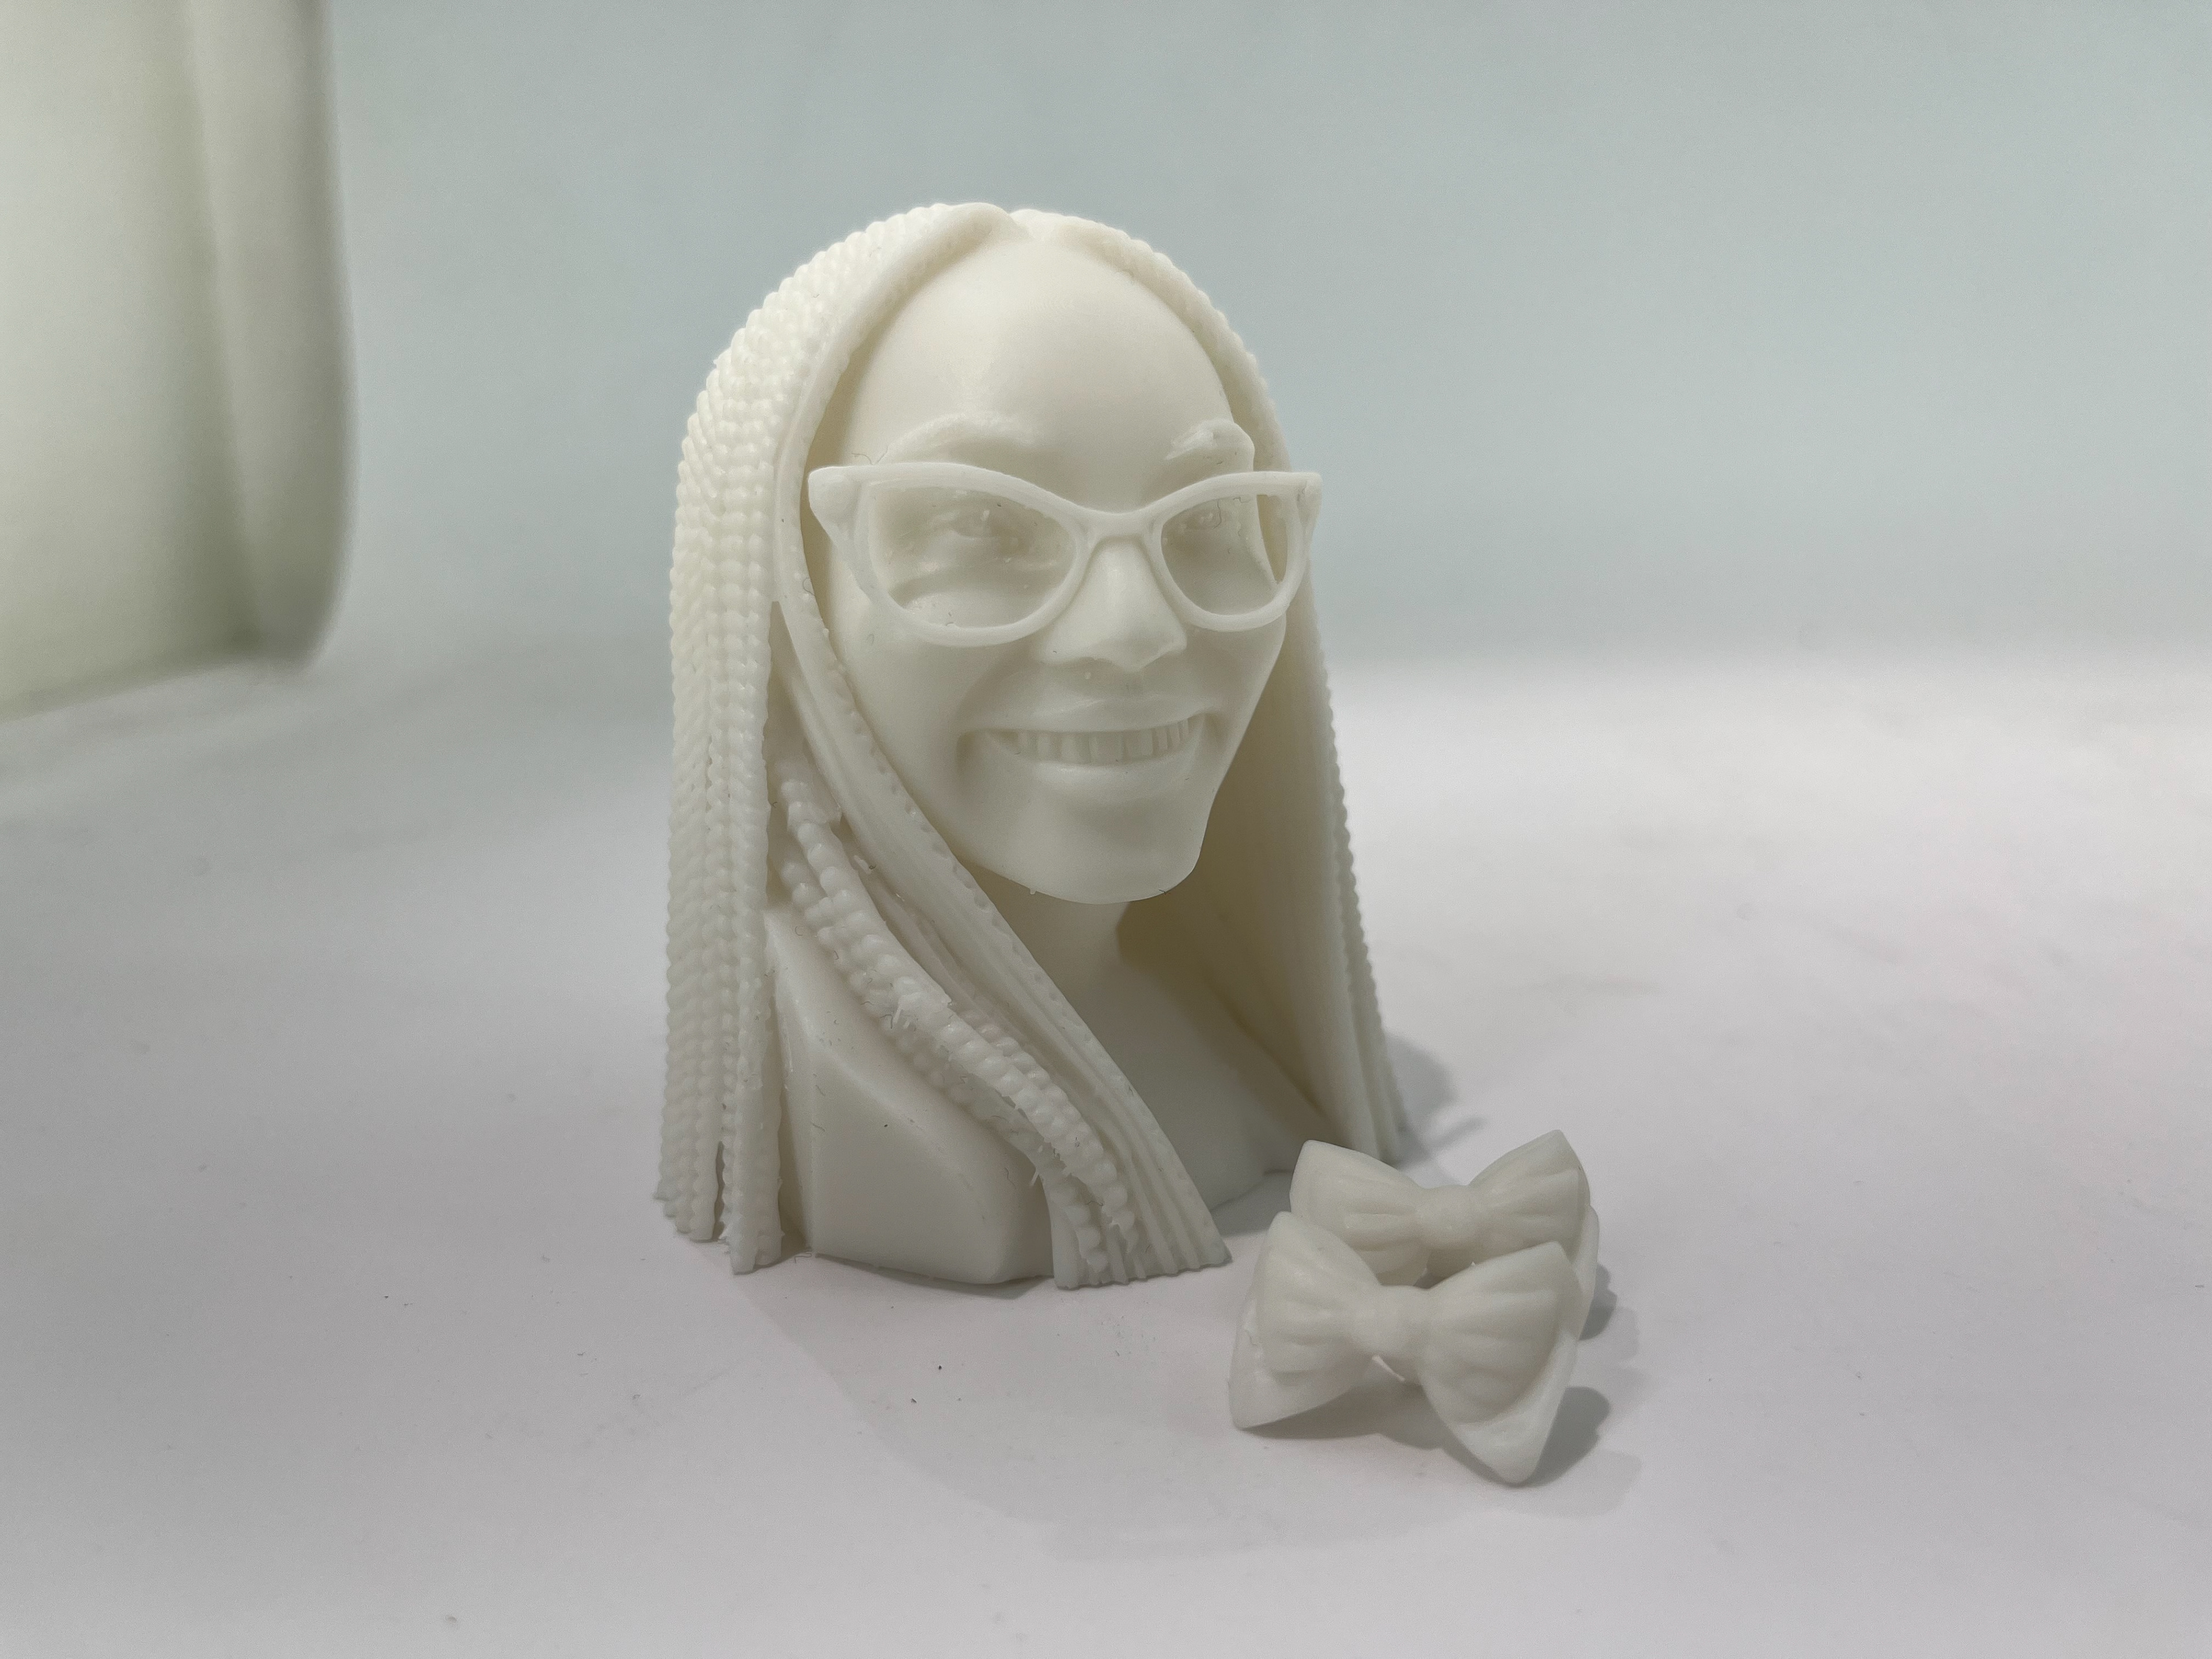
For my independent project I intend on reinterpreting the Bratz Big Babyz dolls as a self-portrait, using digital fabrication to explore themes of identity, beauty, and belonging. By modeling myself as a styling doll head with removable hairstyles, I challenge the history of Eurocentric beauty ideals embedded in toys. The work transforms play into a form of cultural resistance, asserting that Black hair, in all its forms, is not something to be altered or hidden, but celebrated and preserved.
3D Printing
I originally planned to make this bust by doing a 3D scan of myself, mostly because I’m not super confident modeling organic shapes from scratch. I tried following a bunch of Maya tutorials on YouTube, but it quickly became obvious that this wasn’t the most realistic route, I just couldn’t get the generic models to actually look like me. The scan also struggled to pick up the texture of my hair, so I ended up using a purchased braid asset to get the box braids looking accurate. I also tried smoothing out the lumps in the scan, but that turned into a really time consuming process and it left a bunch of holes in the mesh.
Then I was shown another option: Bambu Makerslab Image to 3D tool. I gave it a shot, and my first few results were… pretty wonky. After trying three different photos of myself with different hairstyles, I started getting the hang of how the tool reads images. I realized it really can’t handle strong perspective, so I needed a clear, straight-on photo for it to work. The third attempt came out the best, and that’s the one I ended up using, though it still needed a lot of cleanup.
The face came out surprisingly accurate, but the braids had a lot of weird spacing and gaps. I spent a good amount of time reshaping the hair to make it look fuller and more natural.
In the end, I’m really happy with how everything turned out. It looks great, and I’d still love to print a headband or even a durag later on to add to the piece. Throughout this whole process, I learned a lot, especially about fixing holes, dealing with non-manifold geometry, and keeping the polycount low. I can’t wait to put my custom 3D-printed bust on my bookshelf next to my mini Venus de Milo and David sculptures.
Voila!

Digital Sampler (Laser Cut)
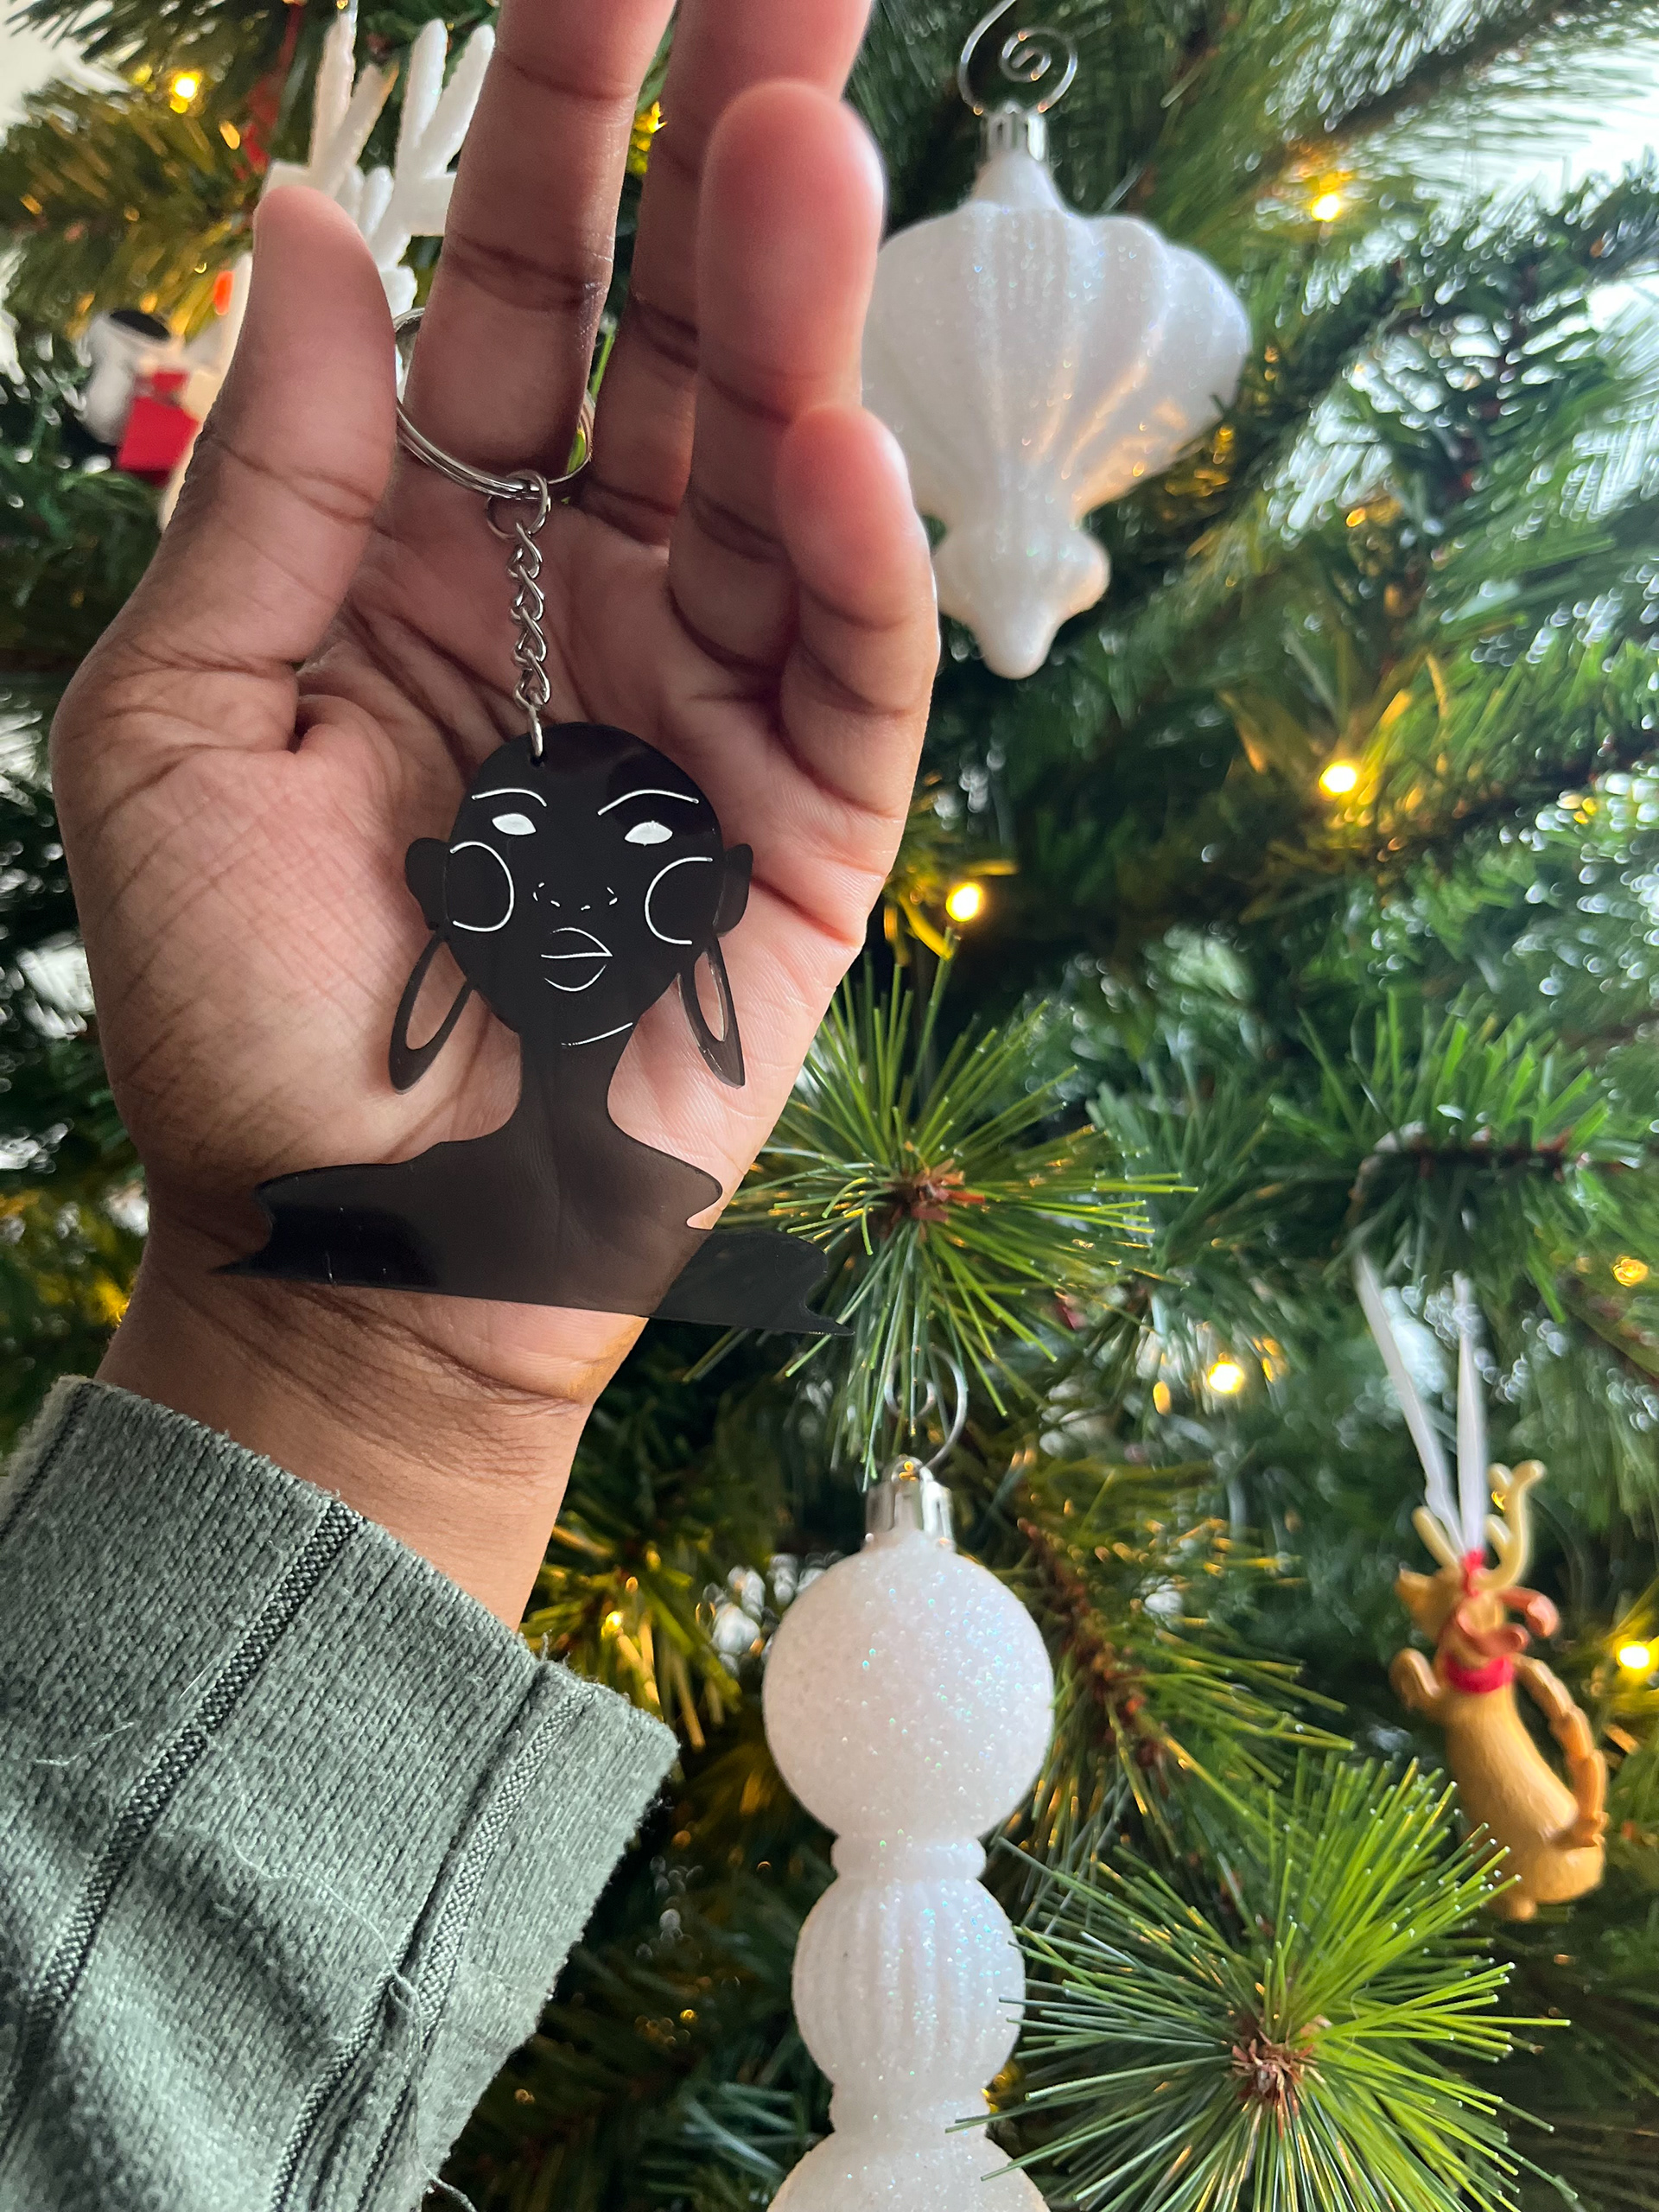
Over the course of the semester, we were required to develop a simple design that would serve as a test model, or sampler, for all the digital fabrication machines used in the course. For my digital sampler design, I chose to create a depiction of a woman with distinct Black features, characterized by oversized earrings and circular lines representing softly indented cheeks.
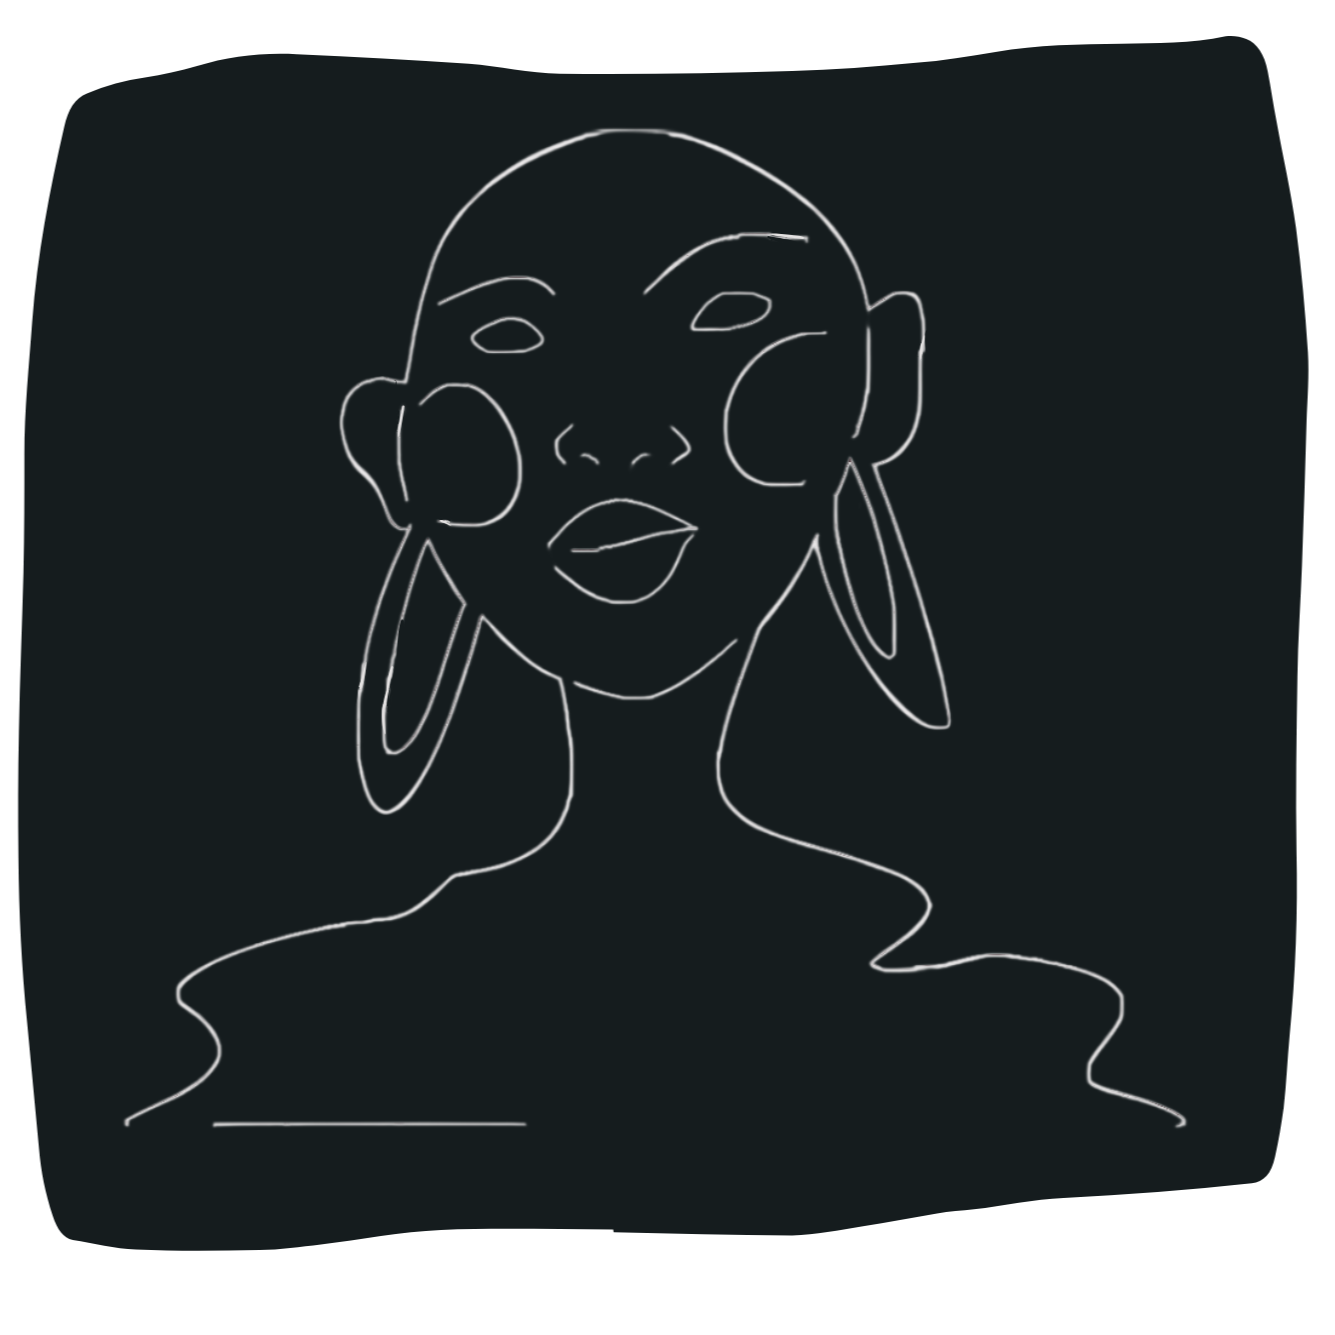
For my laser-cut piece, I decided to begin with a wood test. This turned out to be a valuable learning opportunity, as I discovered that using tape is helpful for catching smoke residue from the machine. In my next laser-cut attempt, I tested my sampler design using black acrylic. I initially assumed masking tape wouldn’t be necessary, but I quickly realized otherwise, the machine left melted acrylic residue around the engraved sections, creating a shadow like effect. After applying everything I had learned from my earlier tests, I was finally able to achieve a result I’m happy with. To finish, I added color to the outlines and engravings using an oil-based Sharpie marker.


Keychain / Bag Chain Project
Given the current keychain phenomenon, with popular examples including Labubu, Monchichi, and Jellycat, it is clear that these accessories have become emblematic of contemporary pop consumerism.
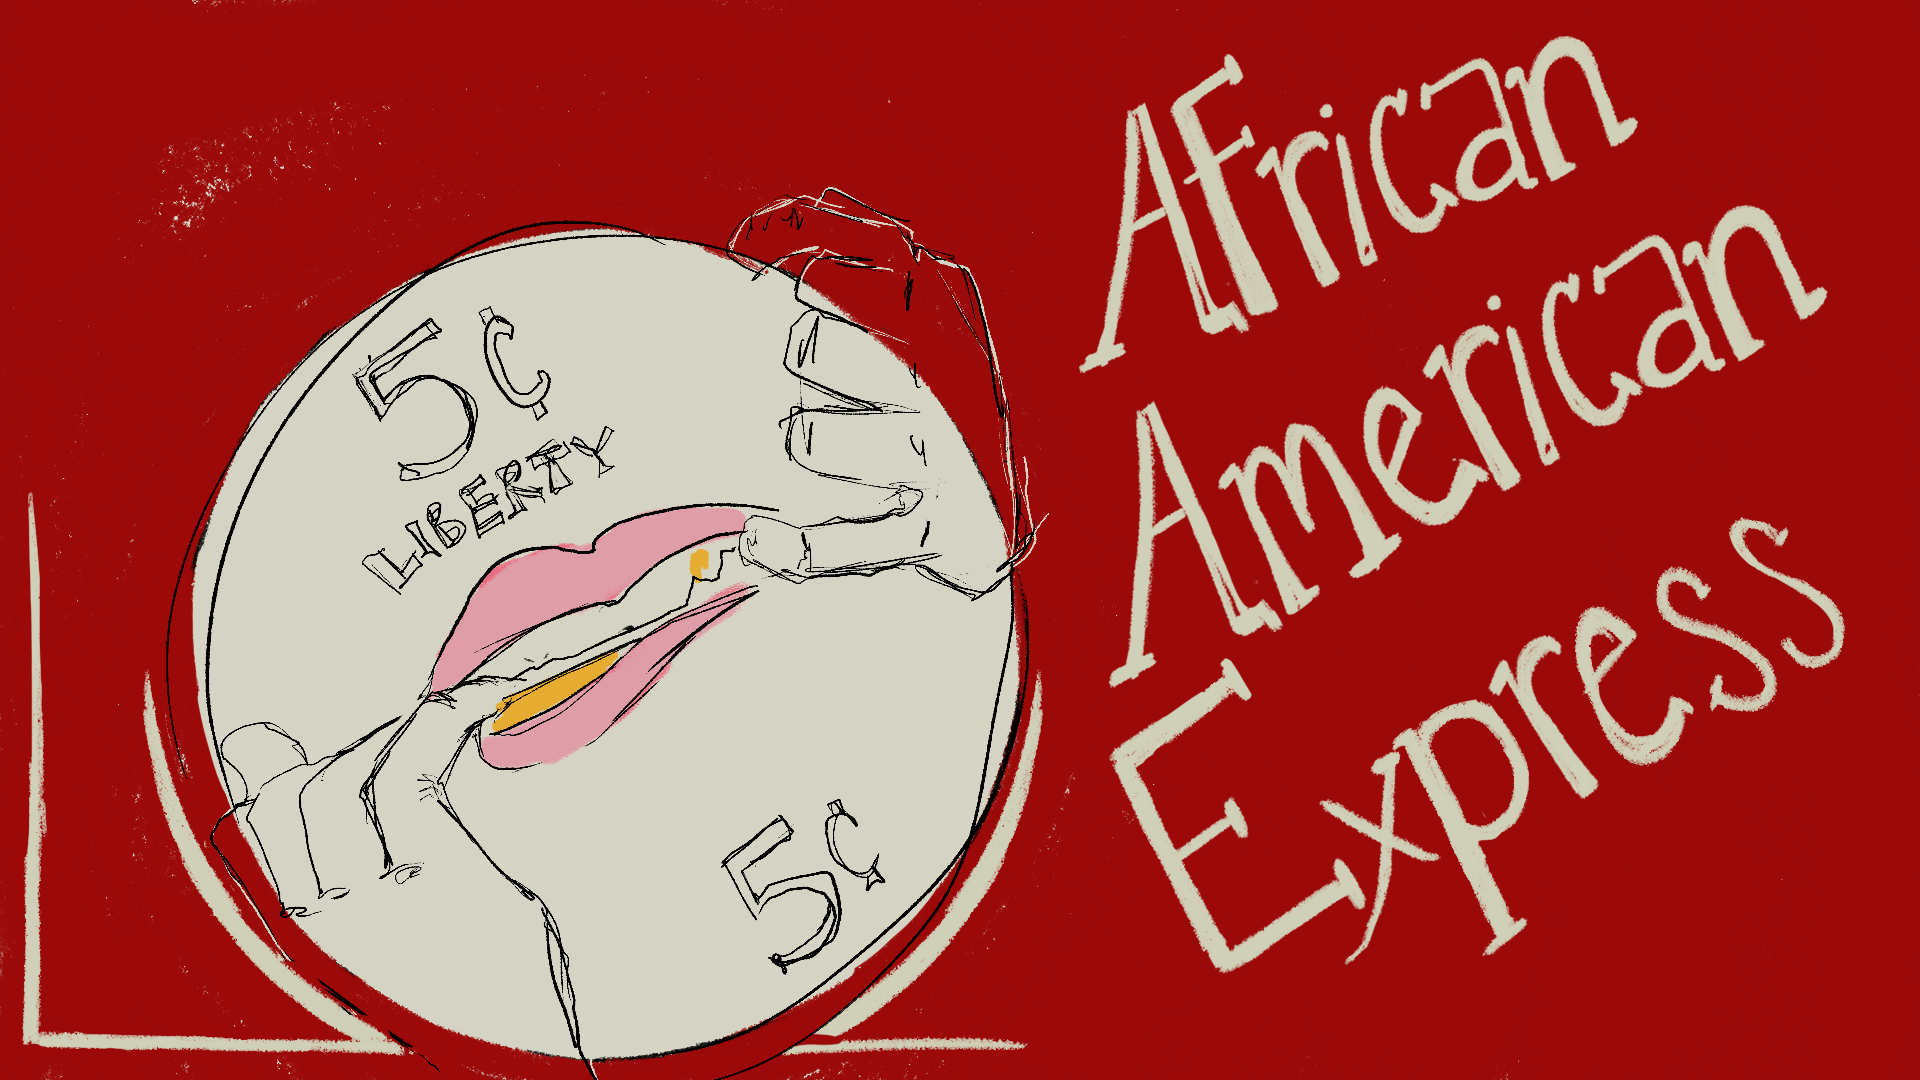
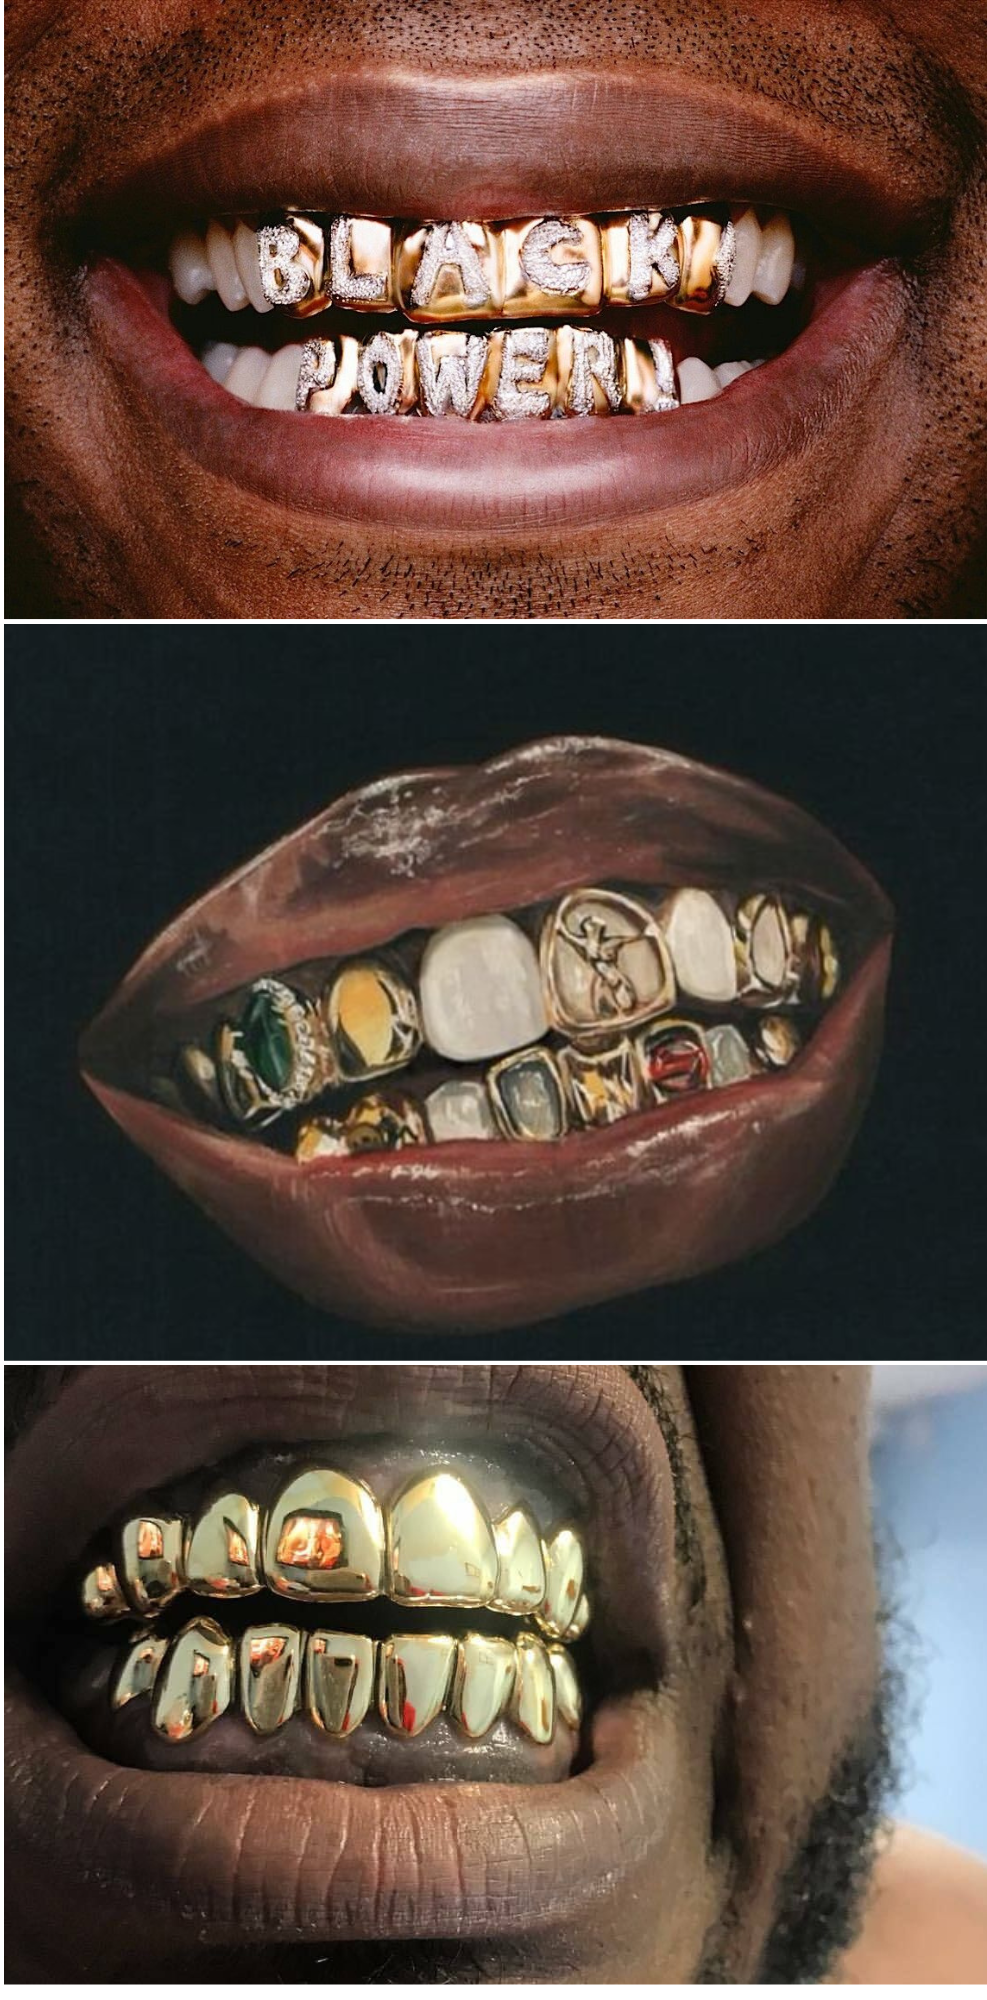
Positioned at the intersection of self-expression and disposable status symbols, keychains reveal how easily personal identity is shaped and commodified through consumer trends. In response to this culture of overconsumption, I chose to challenge the craze by reinterpreting the notion of wealth and status through my own lens. For my keychain assignment, I intentionally drew from a design featured in my previous animation, African American Express.
African American Express is an abstract, evocative work that interrogates materiality within Black consumerism. By critiquing the broader implications of consumer culture in the Black community, the film provides a foundation for reimagining how objects, such as keychains, carry layered meanings of identity, aspiration, and resistance.
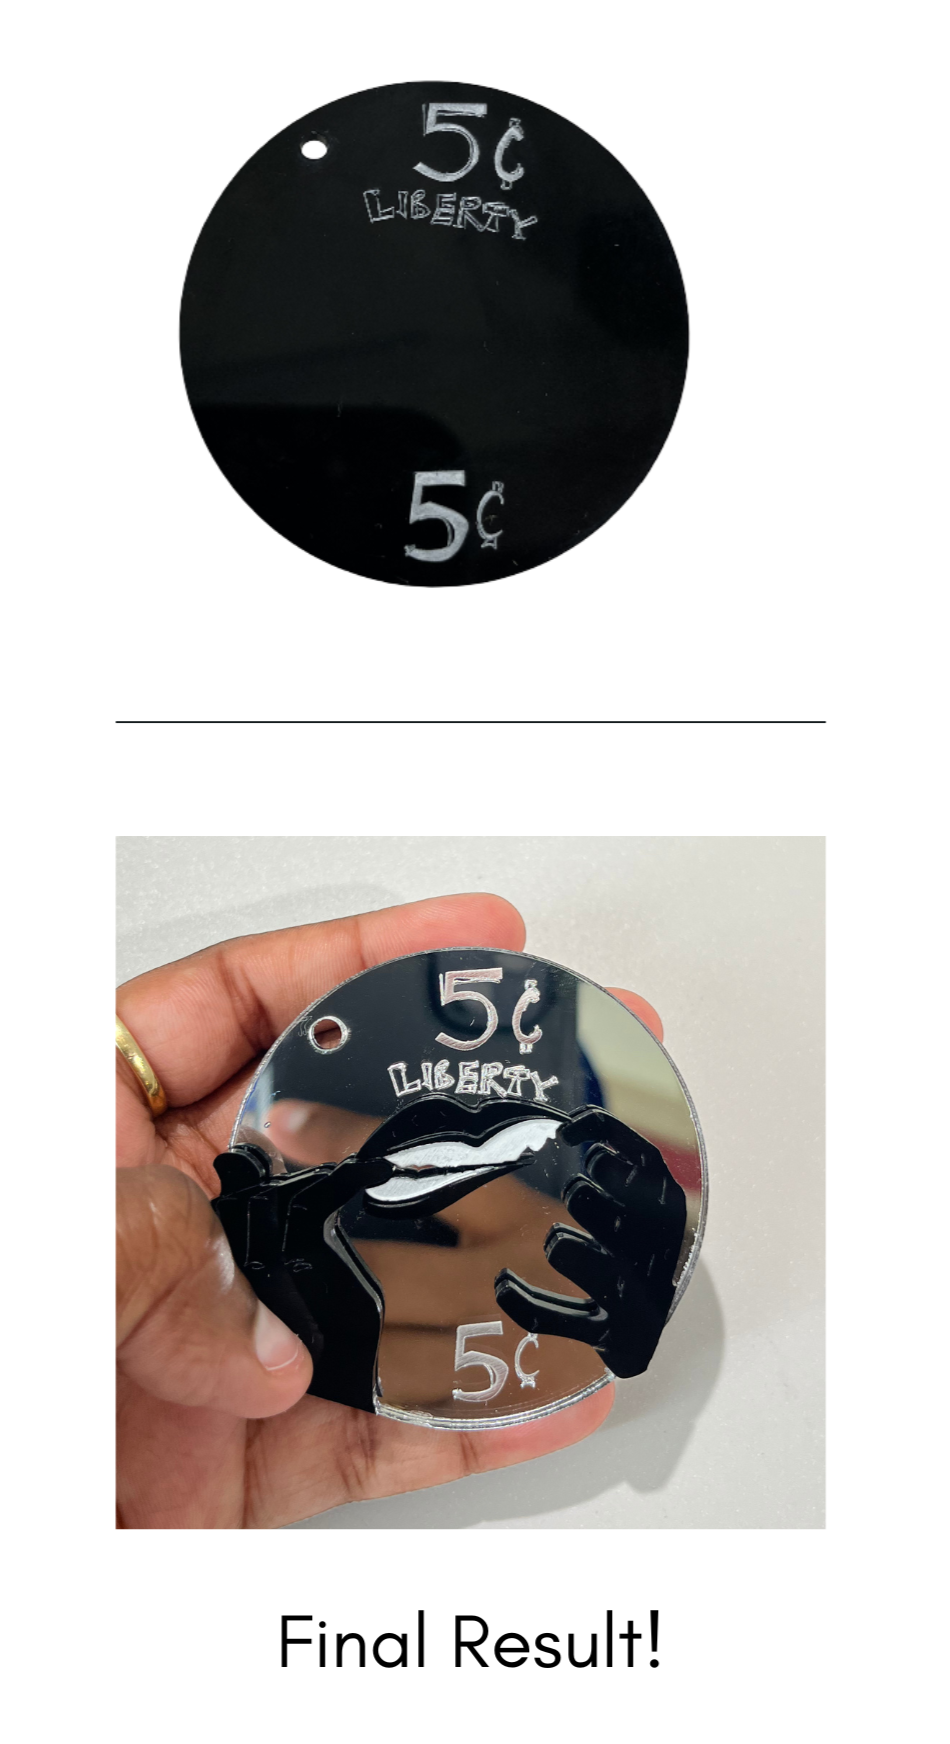
The chosen design is the main title sequence for African American Express, and features a large coin-like shape, stamped with “5¢” as though valued to be a nickel, with the motto being “LIBERTY”. Emerging from the center of the coin is a mouth sporting a set of gold grillz, an iconic symbol of wealth, style, and cultural expression. The contrast between the cold, standardized symbol of money and the vibrant, personalized adornment of grillz creates a powerful commentary on consumerism, wealth, and the redefinition of status within Black culture.
Project Intentions
For my assignment, I would like to make my keychain have a multi layered 3D aspect while utilizing different colored materials, black acrylic and mirrored acrylic. To specify, I would like to have the coin in mirrored acrylic, and the hands and mouth in black acrylic. In order to achieve this I would need to have my model separated into different cuts and separate artboards.
Cardboard Test
As a first prototype, I decided to test out my keychain model in cardboard. In this example I decided to make it about 3.5 inches and another 10% smaller. Some things I realized I would like to think about in the next few tests are that the keyhole ring would need to be bigger in order to accommodate the keychain ring. Also, since I’m in a way piecing the excess pieces like a puzzle, I wonder if I should engrave the hands and mouth piece in the coin as a guide when assembling the pieces

Acrylic Test
I decided to do a second test using black acrylic to better visualize how the design would appear. This proved to be incredibly helpful, as it revealed issues I hadn’t noticed in the cardboard test. One major problem was that the laser cutter was unintentionally piercing some of the etches all the way through, which caused difficulties during painting since the paint would seep through the openings.
After consulting with a lab technician, we resolved this by adjusting the job control settings and running the cut as if it were on cardboard. Once that was successful, I felt confident moving forward with printing my design on mirrored acrylic.
Bonding Phase
For this phase, I underestimated how challenging it would be to glue the black and mirrored acrylic together. Initially, I assumed Gorilla Glue would work, but once it set, I noticed it began to seep out around the layered edges and left a lot of air bubbles. I tried trimming the excess with an X-Acto knife, but in the process I accidentally scratched the mirrored surface.
After consulting with a lab technician, they recommended using Rez N’ Bond. This adhesive bonded the pieces together much more effectively, though it left behind noticeable residue smudges on the mirrored acrylic. Determined to refine the gluing process, I returned on another day with more time to conduct a second test, comparing both Gorilla Glue and Rez N’ Bond. By working carefully, I found that while the Gorilla Glue didn’t seep as much as before, the thick layer was still visible at certain angles on the mirrored base. In contrast, the Rez N’ Bond produced excellent results, the bond was strong, clean, and virtually flawless.